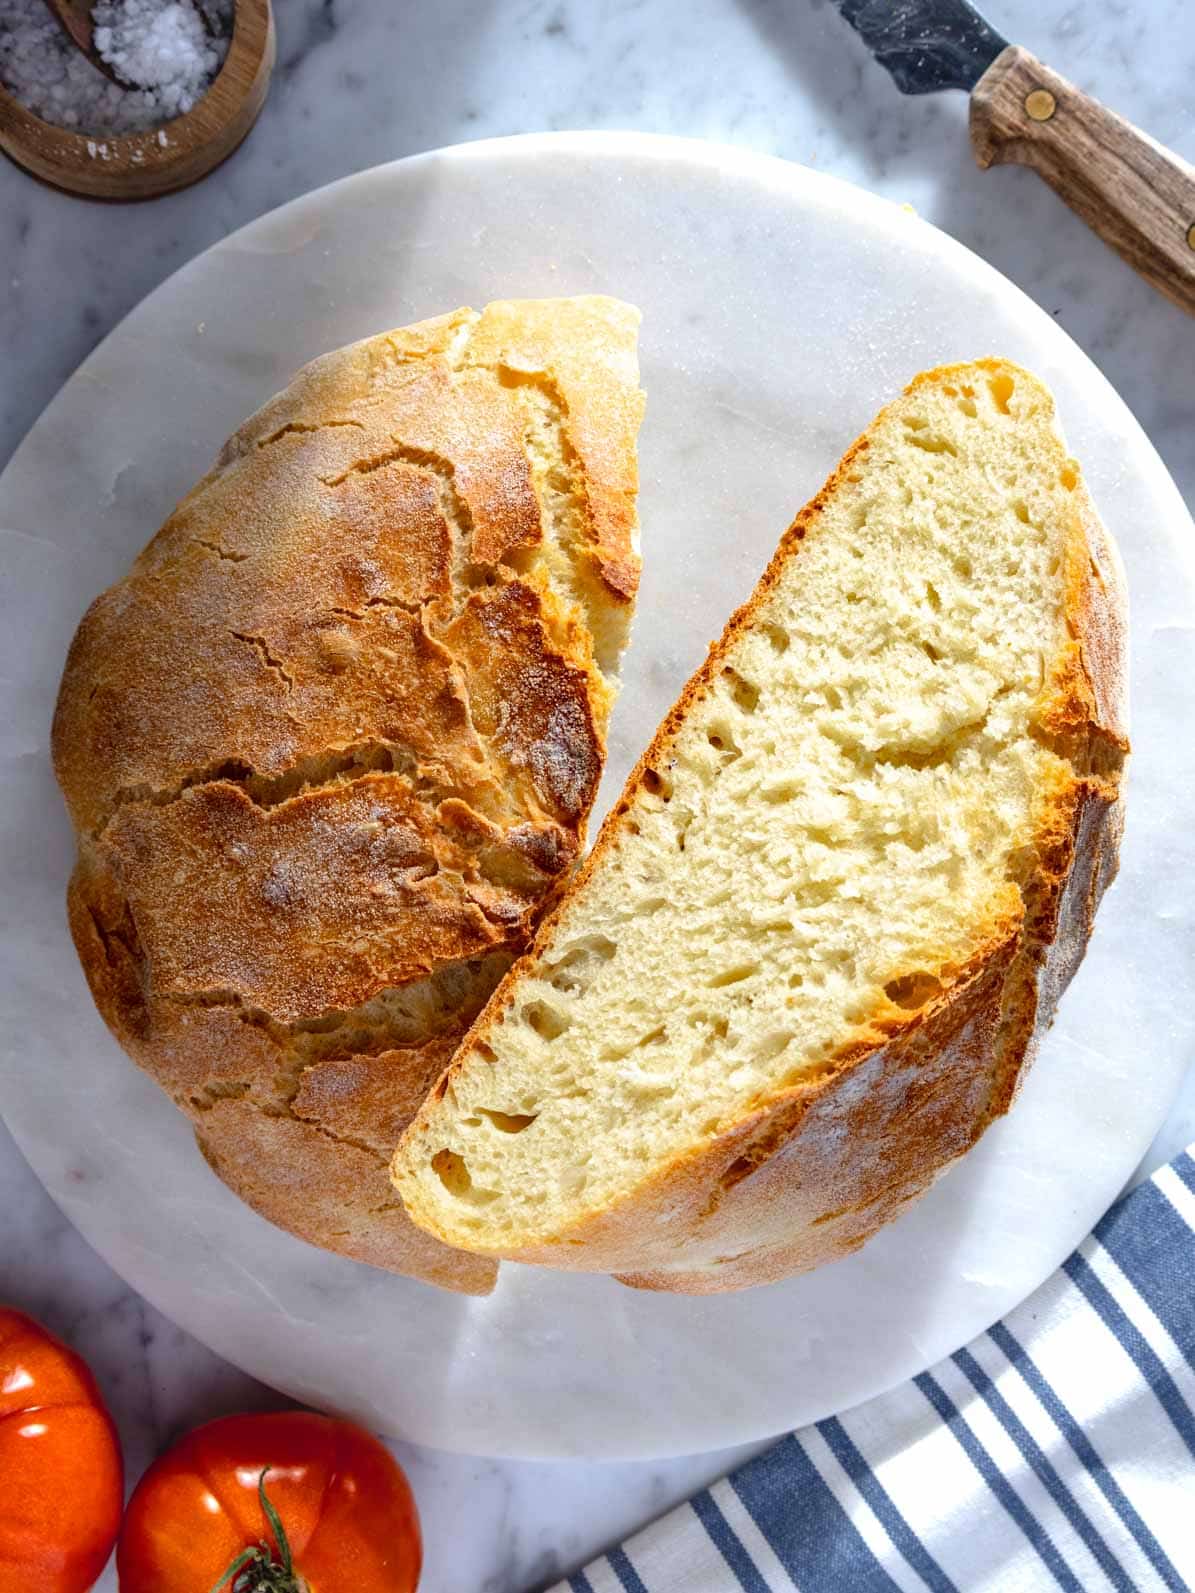
With our easy homemade bread recipe, you can have a delicious loaf of crusty artisan bread with 5 minutes of hands-on time and without making your hands dirty!
The recipe is based on our readers’ favorite no-knead focaccia and schiacciata recipes.
It’s well-tested, works with all flours, and produces one of the best homemade breads.
Introduction
Making homemade bread is my passion; I have been baking a weekly loaf for years. I know, I should get a life 😅. Oh, well!
While I love spending hours making sourdough loaf, I think there’s a place for a simpler homemade bread recipe.
One that doesn’t require hours of stretching and folding and that anyone without any bread experience can bake successfully. Enters our homemade Italian bread 👇.
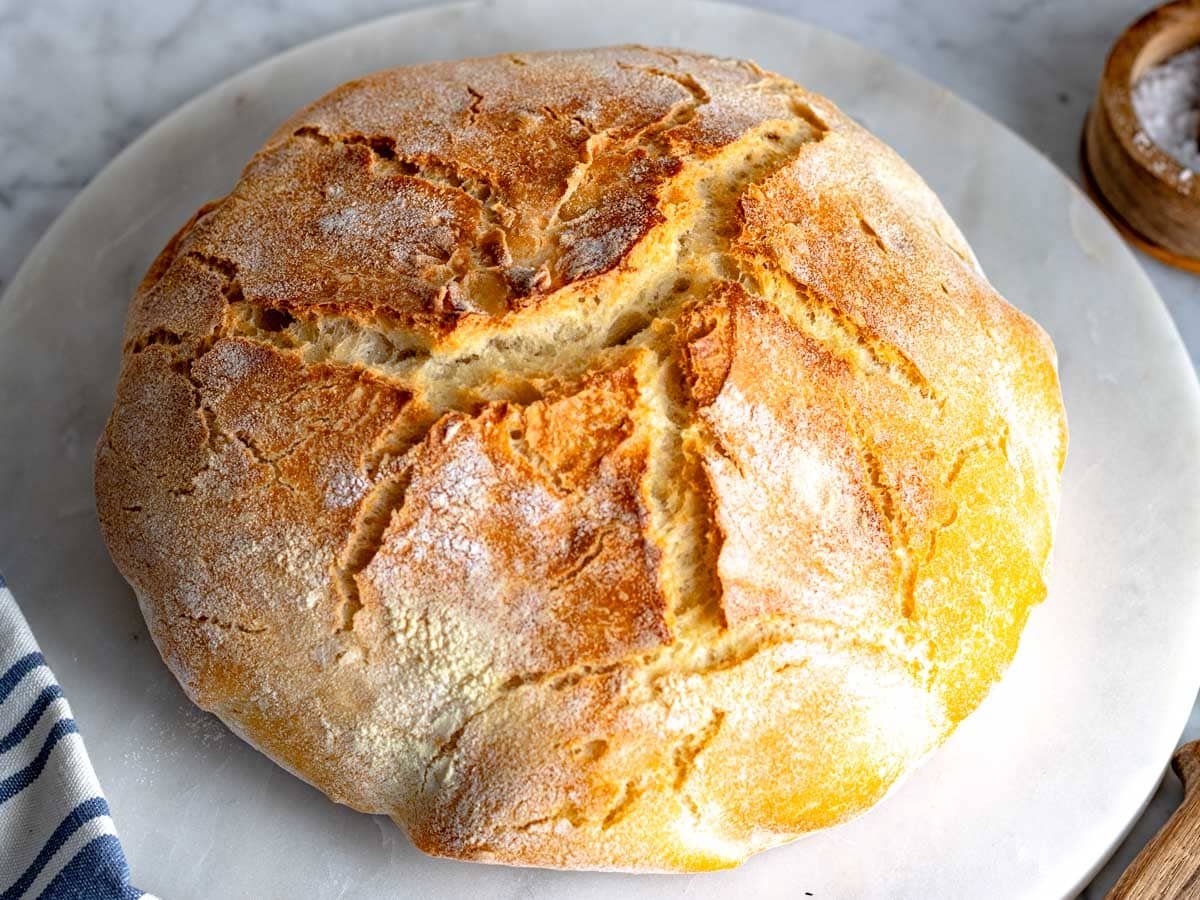
You’ll love this recipe because it’s so easy. I promise you won’t even get your hands dirty.
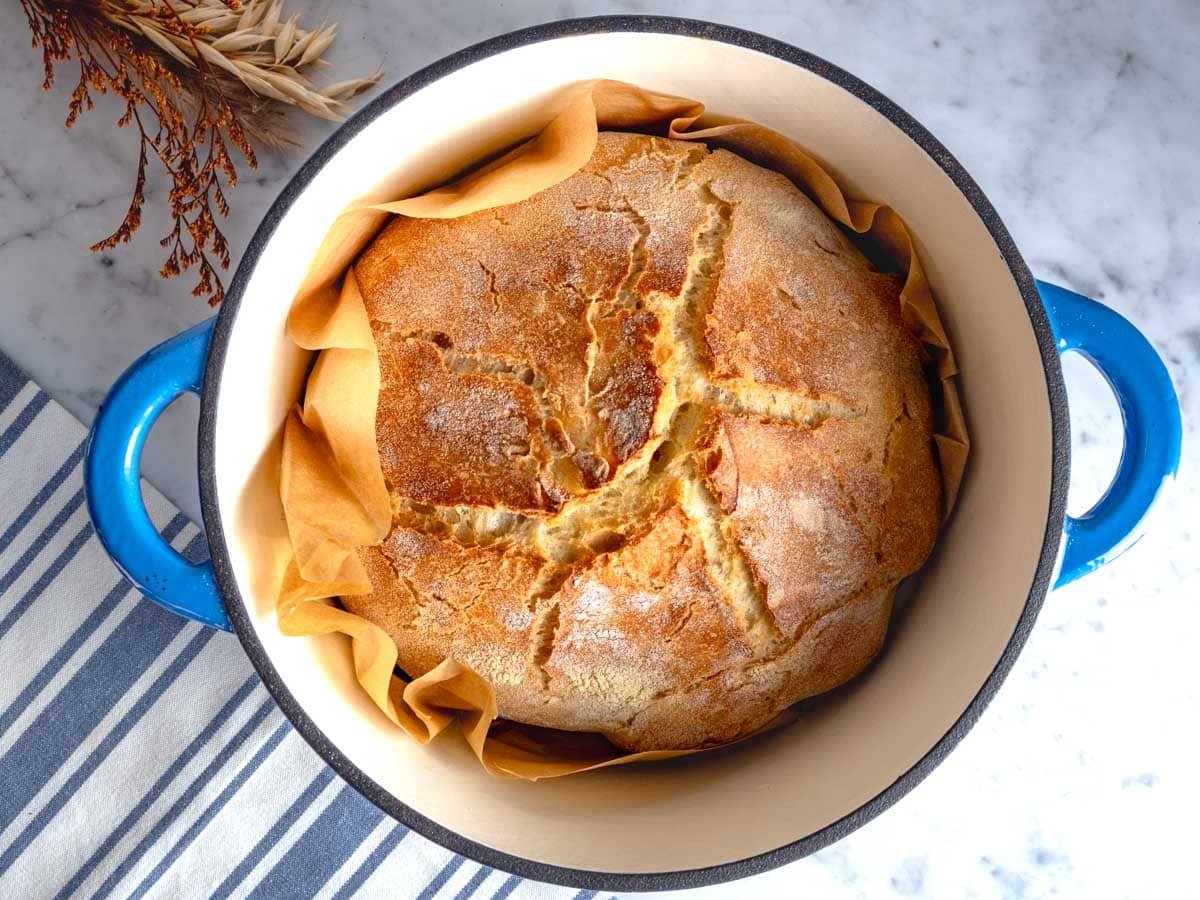
You can expect an Italian-style, artisan white bread loaf with a crunchy, flavorful crust and a soft, fluffy, and compact crumb.
It’s perfect for dipping in hummus, making bruschetta, avocado toast, and PB & J sandwiches.
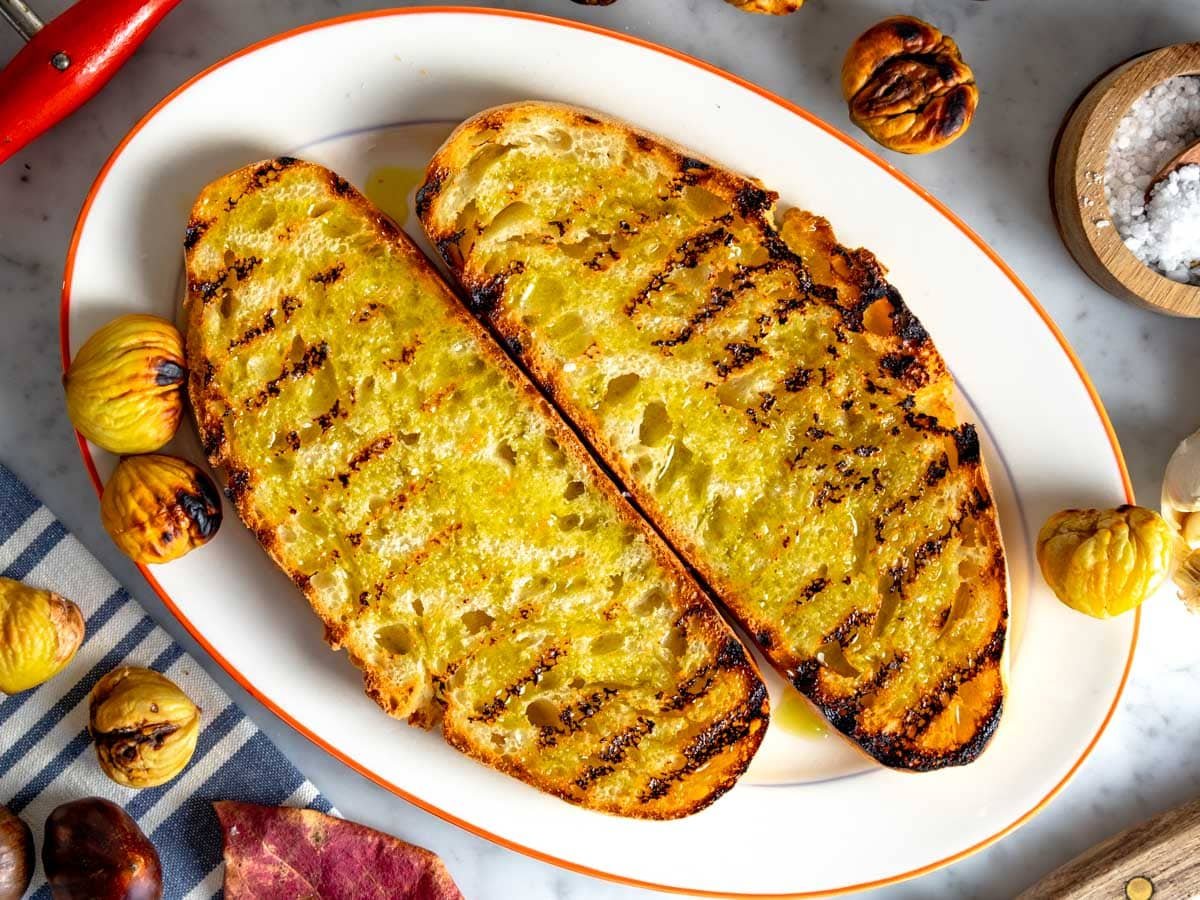
When it gets stale, give it new life by turning it into crunchy crostini excellent with olive tapenade and homemade croutons for easy soups, tasty salads, or Panzanella.
Similar recipes: flatbread pizza, pita bread, Italian piadina bread, naan bread, and quick pizza dough.
Ingredients
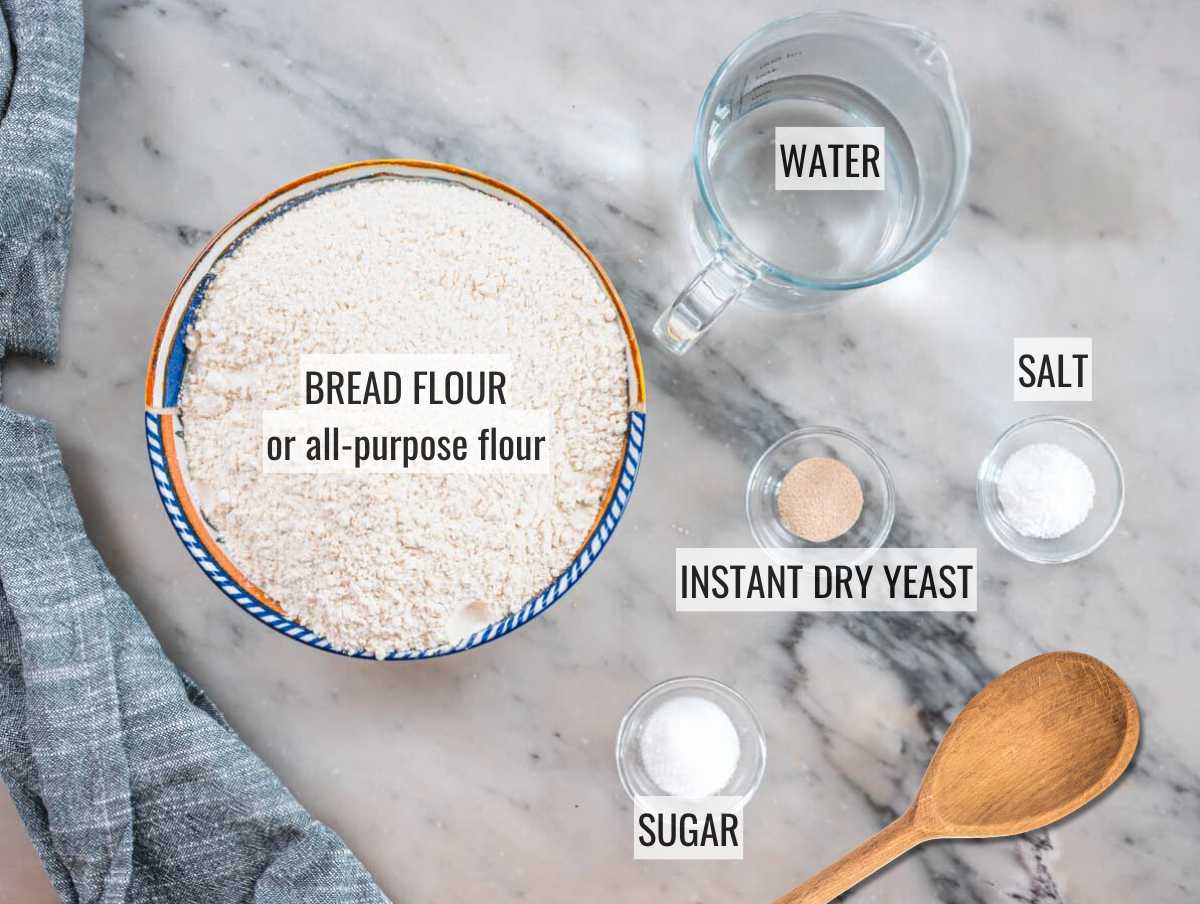
Quantities are in the recipe box at the bottom of the page.
Flour
You can make this homemade bread recipe with any plain/all-purpose flour or bread flour.
We tested several brands, from the cheapest supermarket brands to more expensive flour mills, and this recipe is designed to work with all.
However, choose bread flour with at least 11.5% protein content for best results. The label will tell you this.
If you live in the USA and Canada, that’s not a problem, as local flours generally have more protein than European flour.
As a rule of thumb, flour with a high protein content of 13% or more can withstand longer proofing time in the fridge (12 to 36 hours).
A flour with a lower protein content of around 11% is unsuitable for long proofing time.
A flour with less than 11% protein is not recommended for making bread.
Yeast
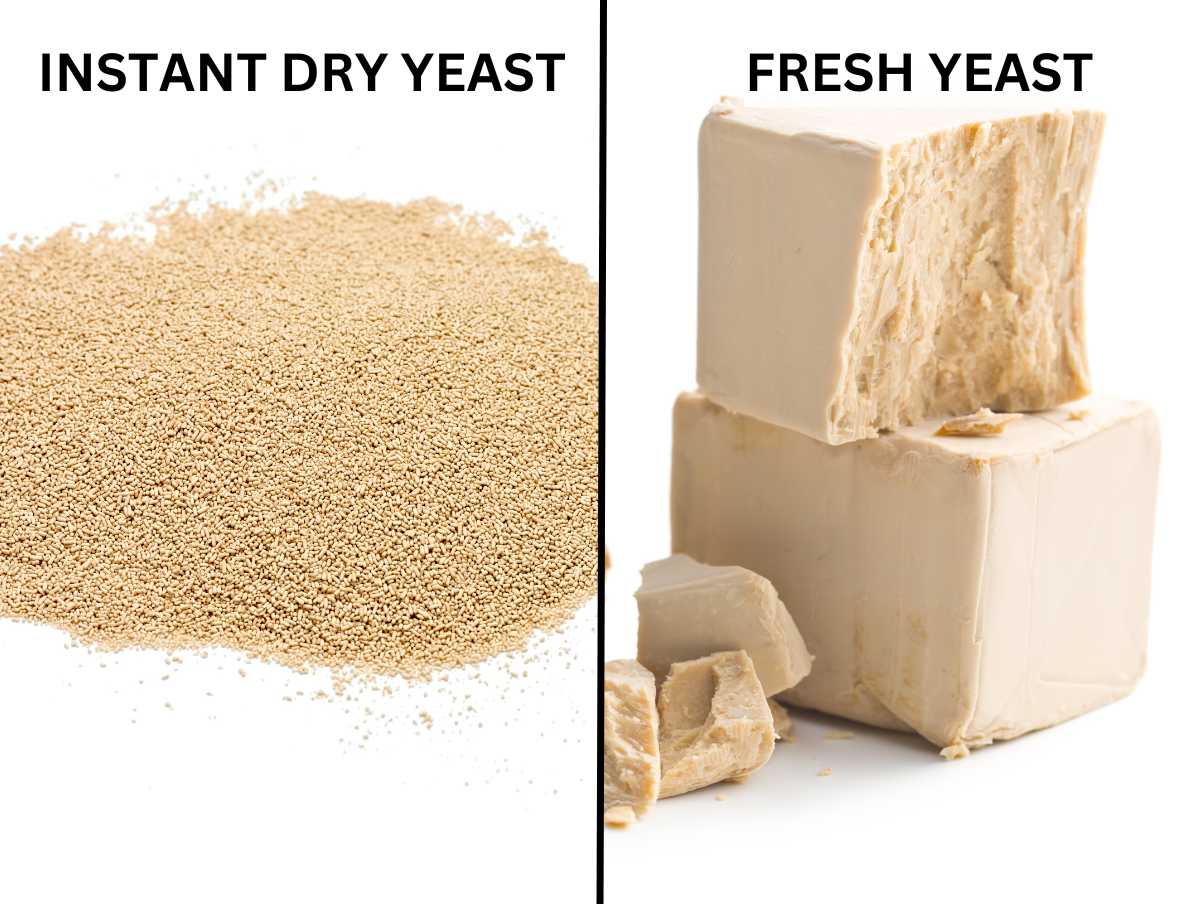
The most common types of yeast you’ll encounter when baking at home are fresh, active, and instant dry yeast.
They are all made of the same thing—Saccharomyces cerevisiae or brewer’s yeast—but they work slightly differently due to the different production processes.
For an amateur baker, instant dry yeast is the easiest and most reliable. It comes in the form of a fine granular dust.
We recommend Caputo dry yeast, Red Star Saf Instant, and Dr. Oetker Instant yeast. Of course, there are many other excellent brands. Pick one you trust.
You can substitute fresh yeast for dry yeast. In this case, you’ll need three times more fresh yeast than dry yeast.
Equipment
MIXING BOWL: You’ll need a large mixing bowl to allow the dough to double in size. We recommend glass, ceramic, or plastic bowls.
SPOON: You’ll need a wooden spoon to mix the dough and a regular spoon to fold the dough.
DUTCH OVEN: When making bread at home, it is best to bake it in a Dutch oven or in a pot that can go in the oven for the first 20 minutes.
Baking in a closed Dutch oven creates the perfect conditions for the bread to rise. The steam from the dough is trapped in the Dutch oven, creating a moist environment.
This moisture prevents the bread crust from setting too quickly, which is good.
Why? A crust that forms quickly (if you bake without a Dutch oven) stops the bread from rising to its fullest size. A crust that forms slowly (if you bake in a Dutch oven) allows the bread to rise to its fullest size.
If you don’t have a Dutch oven, you can use any metal pot or casserole with a lid that can go in the oven.
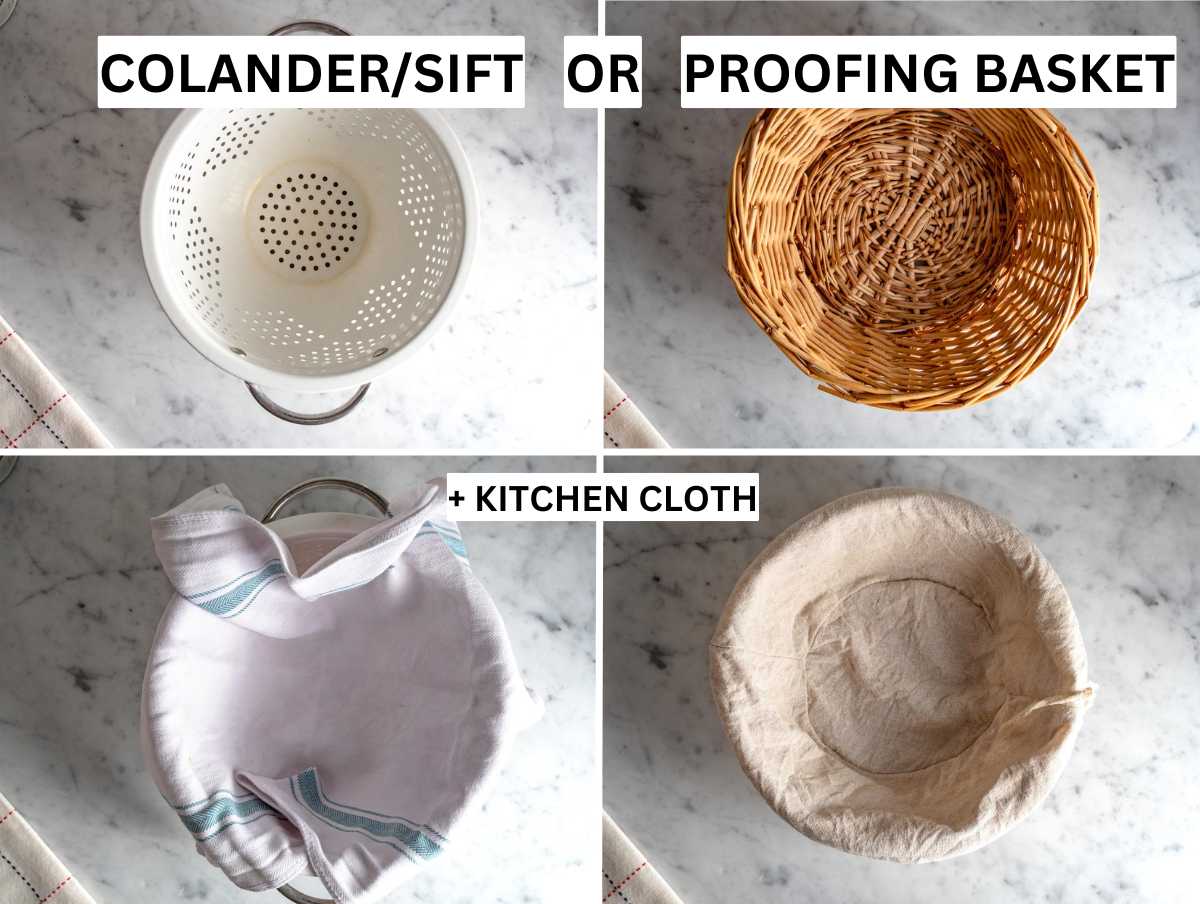
PROOFING BASKET: You can purchase a proofing basket online or use a colander or sift lined with a clean kitchen cloth.
You could also use a clean bowl lined with a kitchen cloth as a last resort. However, I recommend the colander or sift because it lets the dough breathe.
It’s important to dust the cloth with enough flour so the dough doesn’t stick. The best flour for this is rice flour.
How to make no-knead homemade bread
1. Mix the no-knead dough
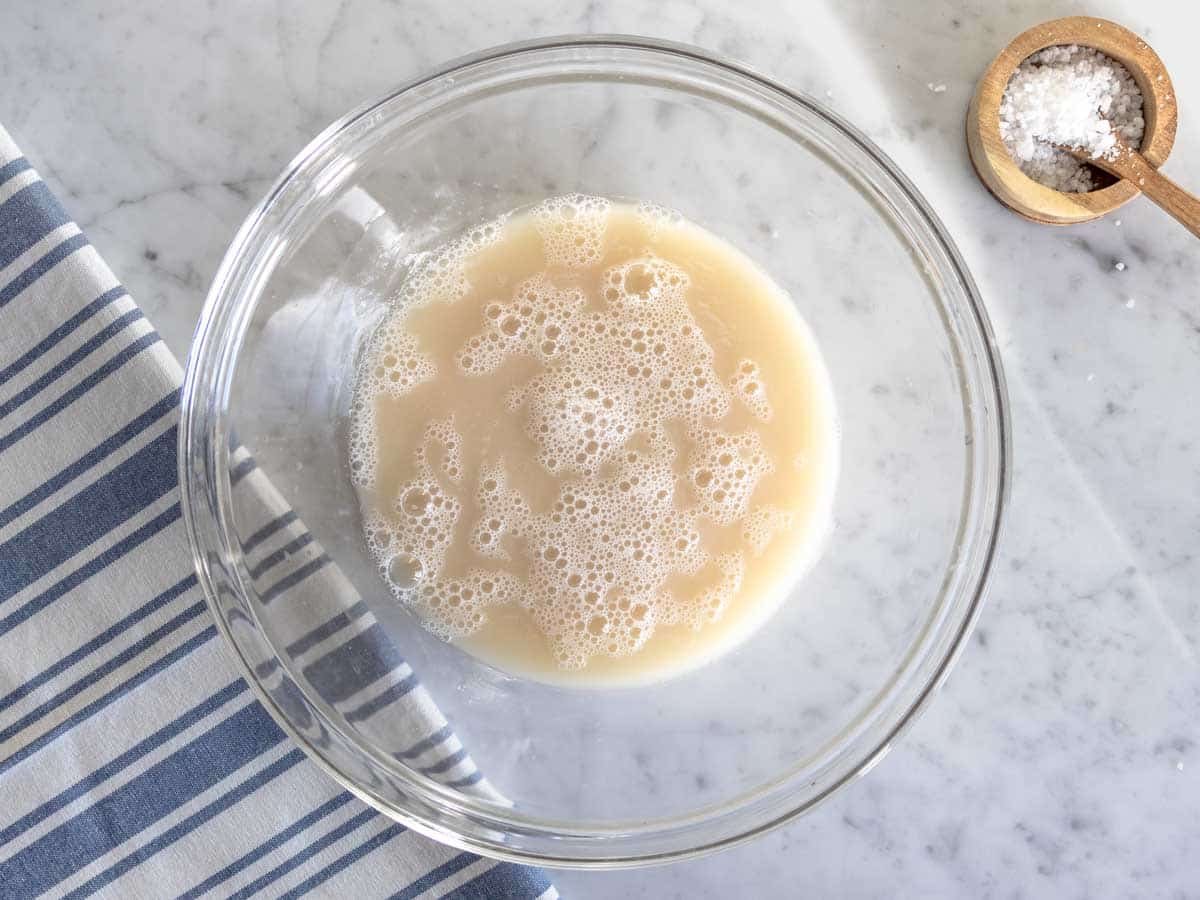
To a large mixing bowl, add lukewarm water, sugar, salt, and yeast.
Whisk until the yeast is dissolved.
Tip: If it doesn’t dissolve, it might be inactive. I recommend starting over with new yeast.
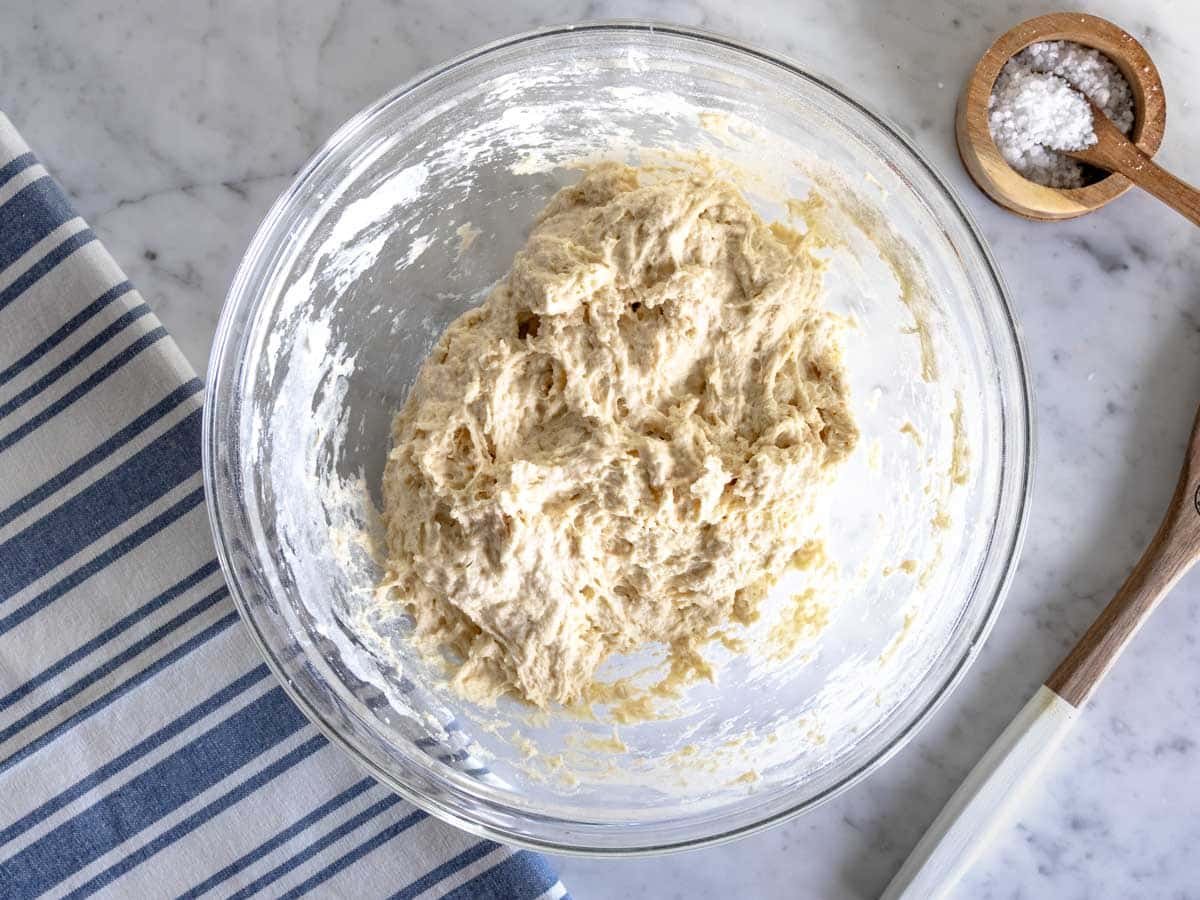
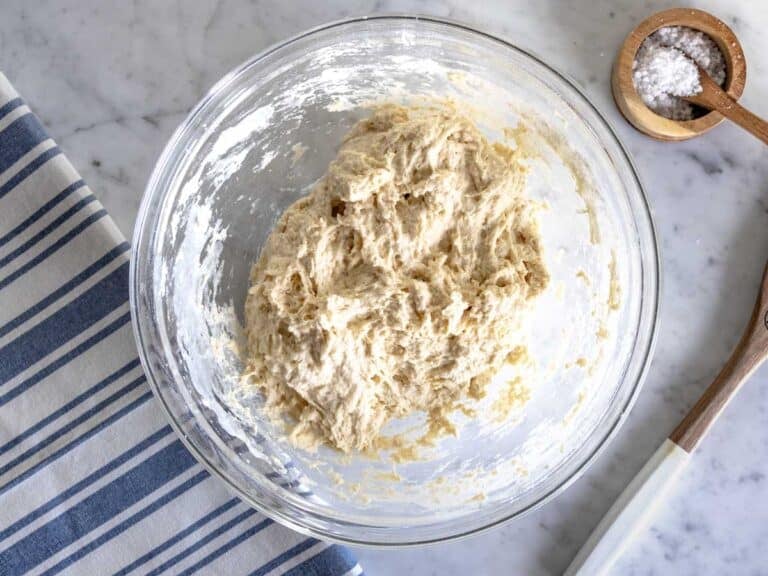
Add the flour and stir with a wooden spoon until a shaggy dough forms. The water should absorb all the flour.
Tip: A shaggy dough is one without dry spots of flour. It should be lumpy, cohesive, and well mixed, but not smooth.
2. First proofing
Turn your oven on for 30 seconds, then turn it off. We use the oven as a proofing chamber.
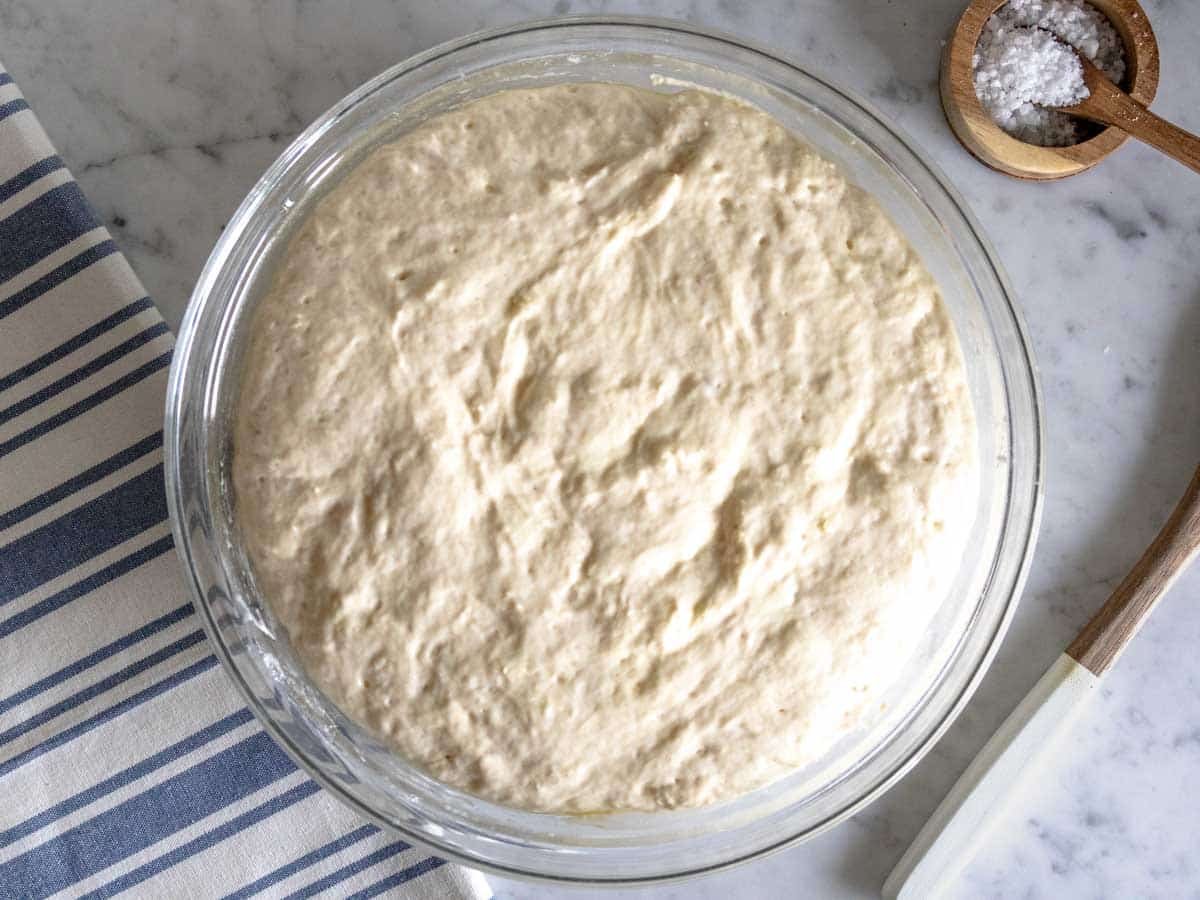
Cover the bowl with a lid or plastic wrap and let it proof in the lightly warmed oven for 1.5 to 2 hours or until it doubles in volume.
Tip: Especially in winter, when room temperature is below 77°F or 25°C, it is best to let your dough proof in a lightly warmed oven to create the perfect conditions for the yeast to thrive (warm, moist, draft-free environment).
3. Folding the dough
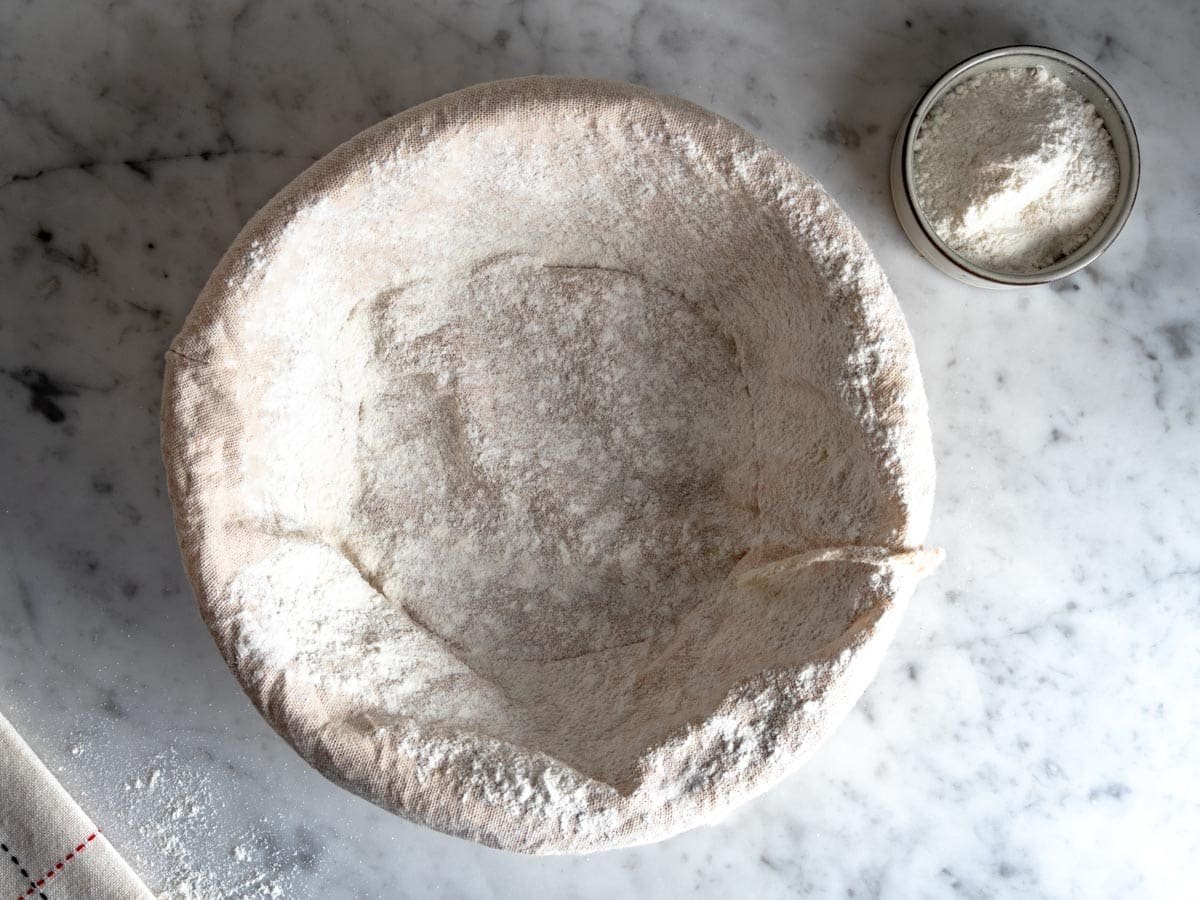
Dust your proofing basket with flour. I recommend using rice flour as it’s less sticky than regular flour.
If you don’t have a proofing basket, use a sift lined with a clean kitchen cloth.
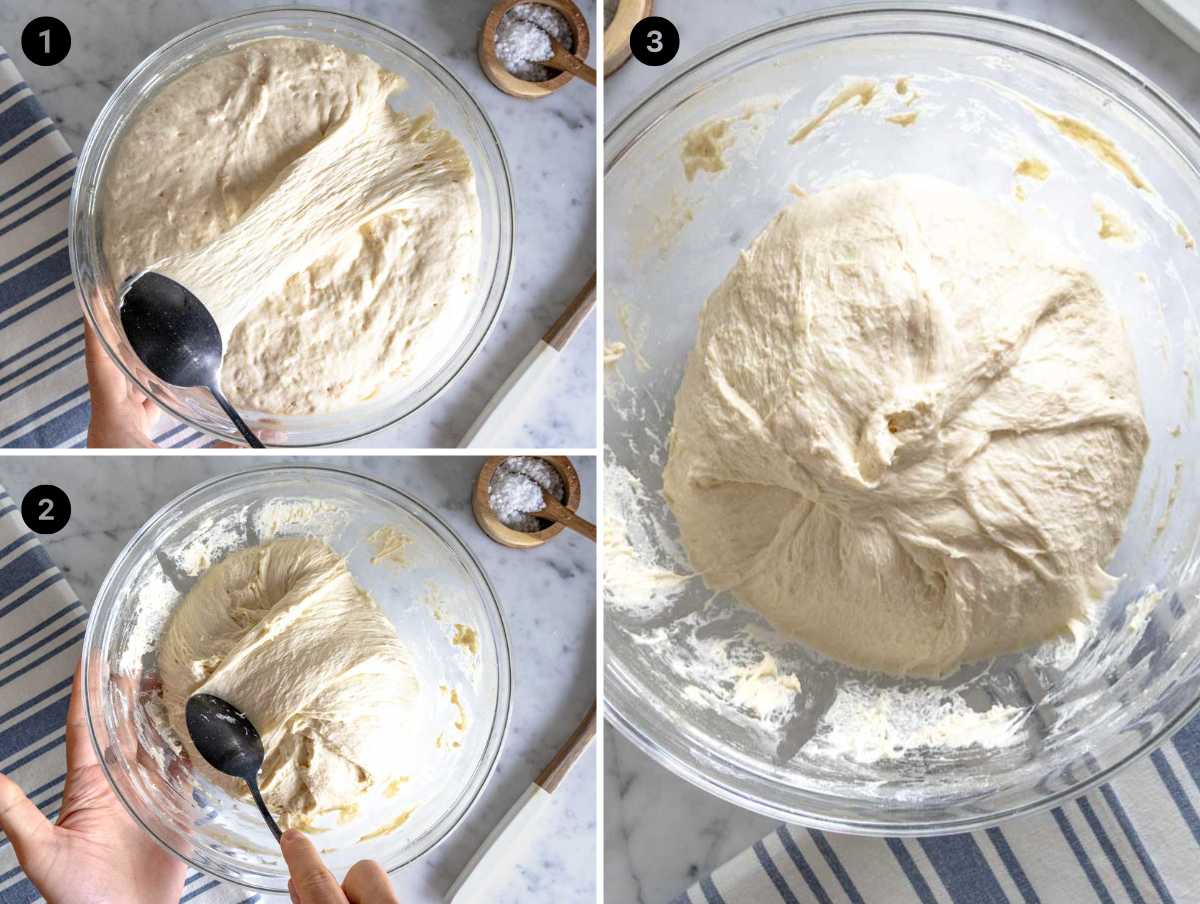
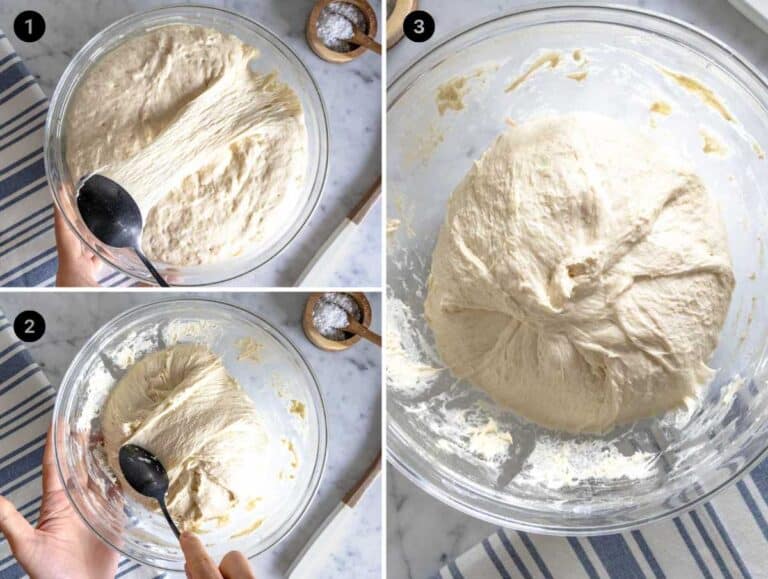
Fold the proofed dough in the bowl with a spoon over itself 20 times (it takes 30 seconds), moving from the outside to the center of the dough.
Tip: The dough is initially sticky but gets less sticky as you fold it. This step is essential to giving the bread structure so that it holds the air and rises as it bakes.
4. Final proof
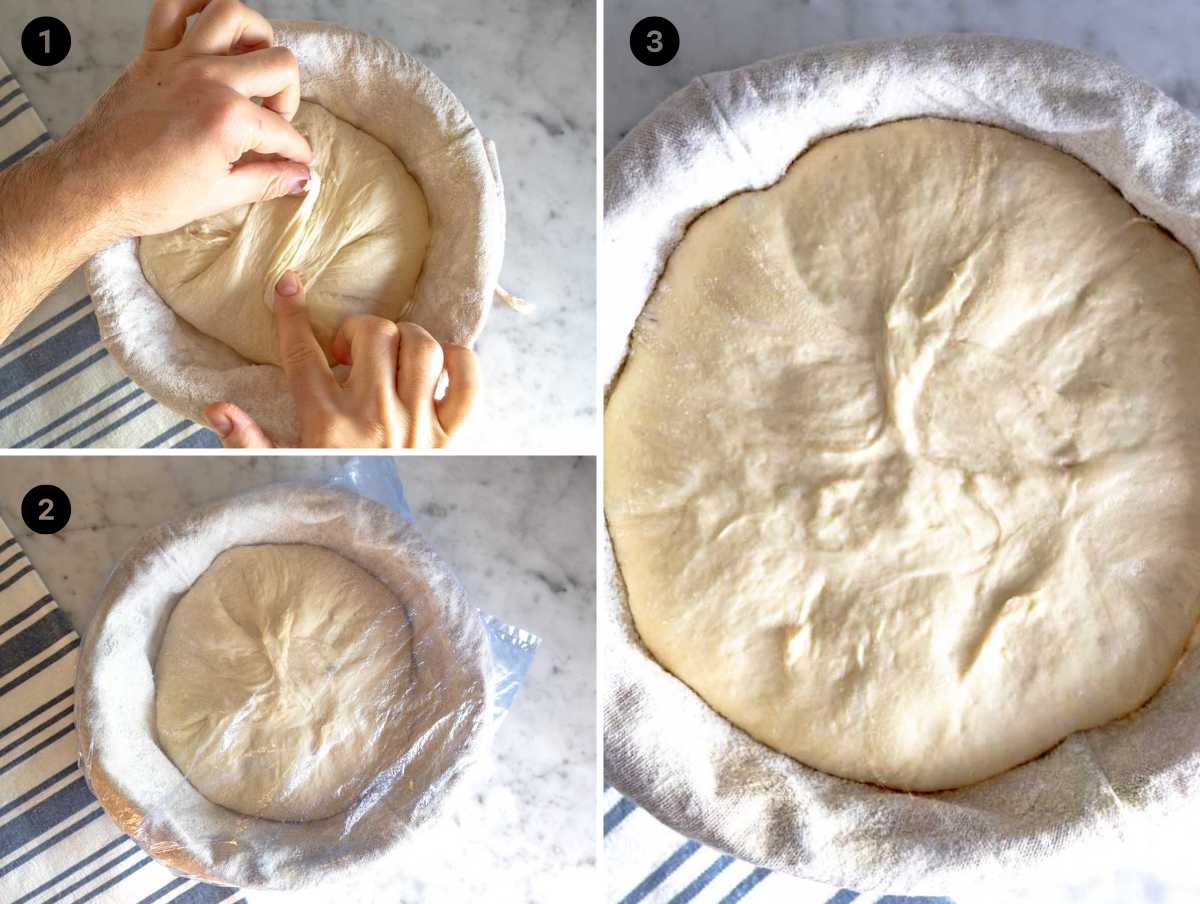
After folding, transfer the dough onto the floured proofing basket, folded side facing up.
You can pinch the dough four or five times to seal the top and tighten its structure.
Put the basket in a plastic bag (I use a large freezer bag) and let it proof again.
QUICK PROOFING: 45 to 60 minutes at room temperature or in a slightly warm oven. The dough should grow by about 50%, not double in volume.
SLOW PROOFING: 8 to 16 hours in the fridge.
5. Baking the bread
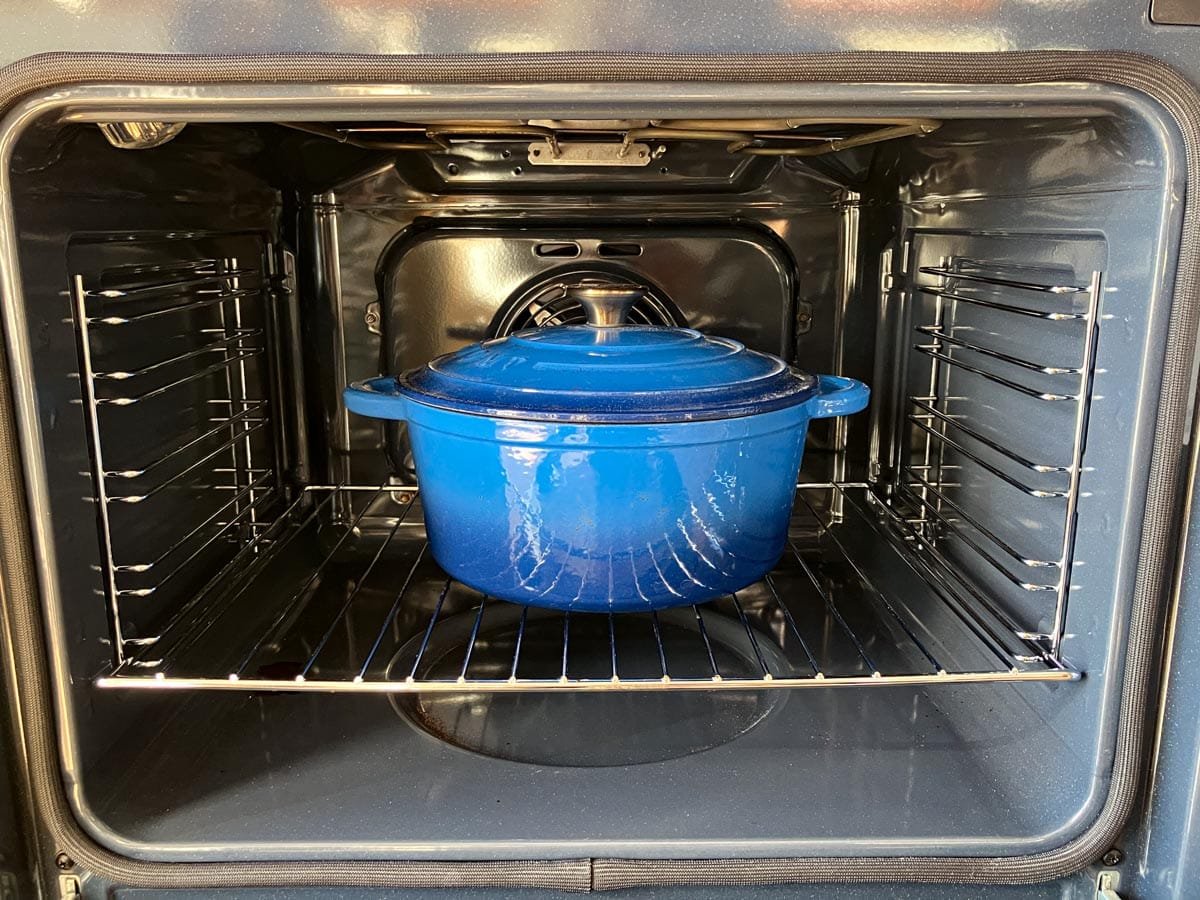
Put the Dutch oven with the lid on inside the oven on the lowest rack.
Preheat the oven to 450°F or 230°C with the Dutch oven inside. Let it preheat for 20 minutes.
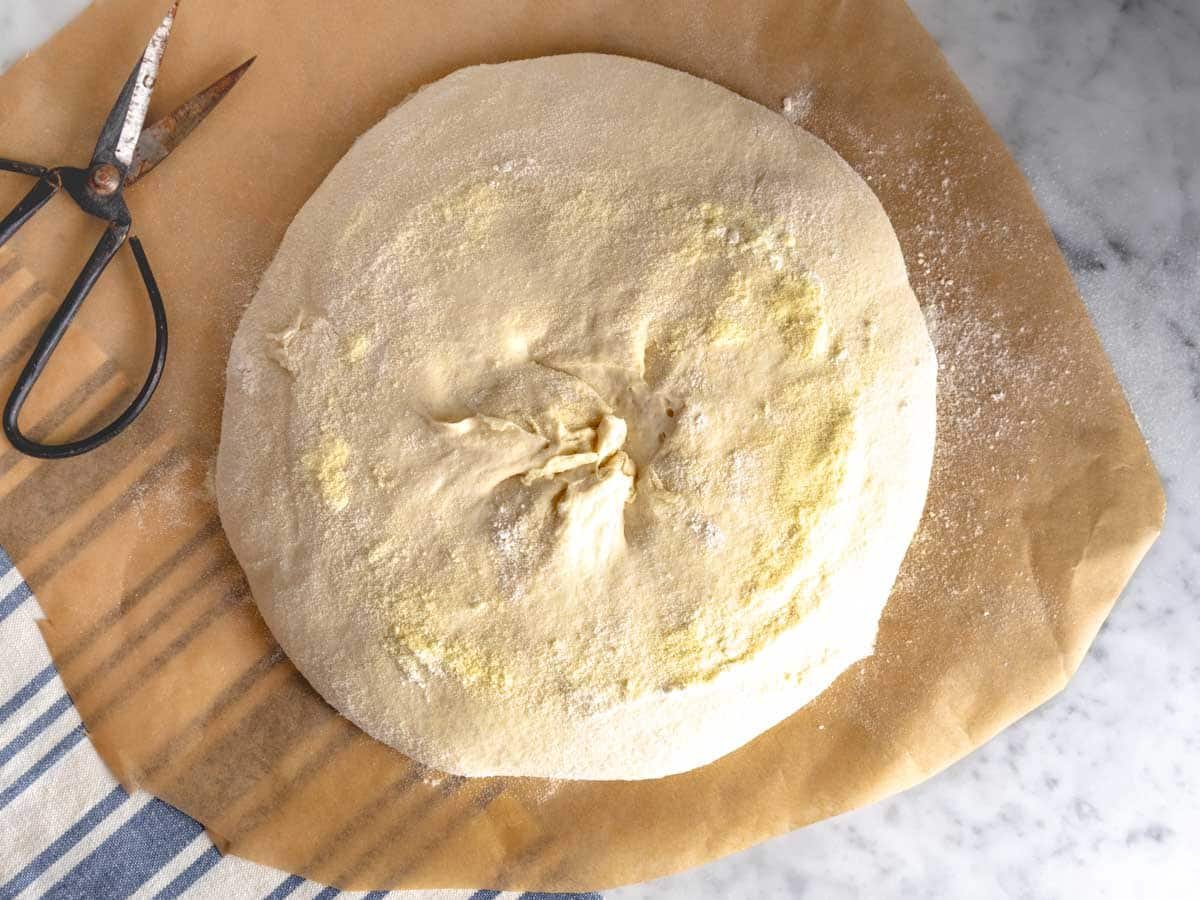
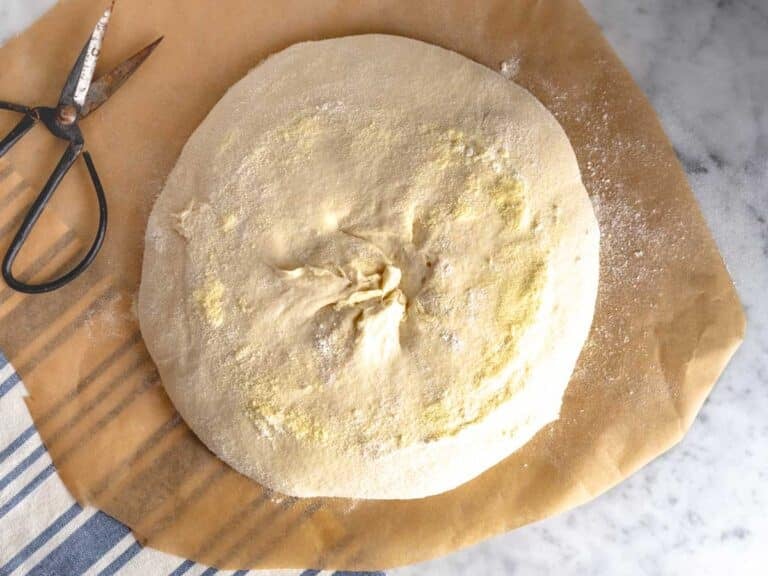
Remove your bread basket from the plastic bread and place a sheet of parchment paper over the dough.
Gently turn the basket onto your worktop so the dough falls onto the parchment paper.
With scissors, cut a small hole at the center of the bread. Also, cut off excess baking paper.
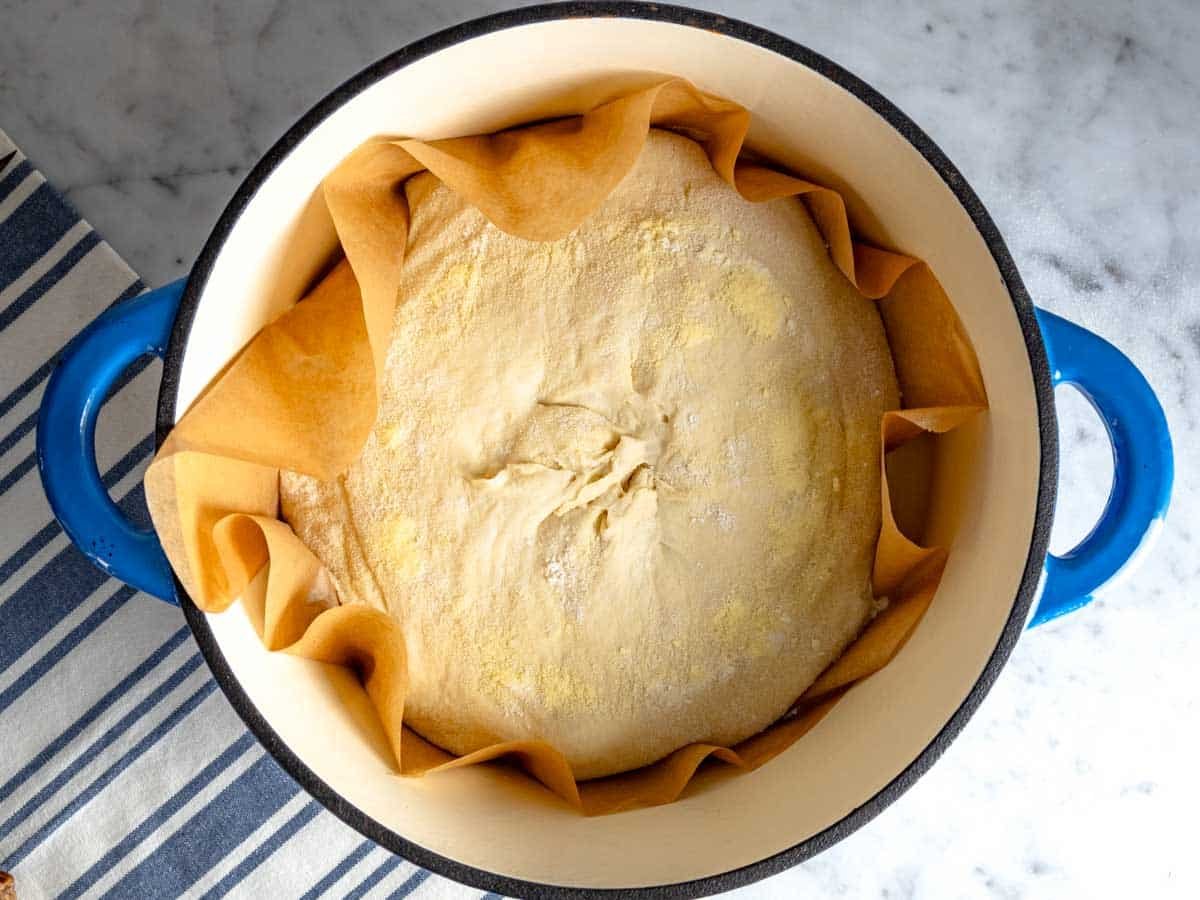
Now, carefully remove the Dutch oven from the oven and put it on a coaster on your worktop or stovetop.
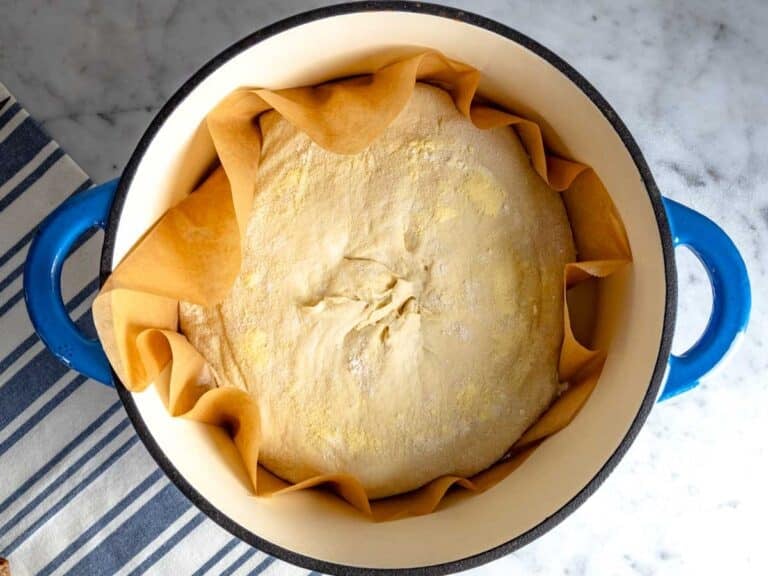
Open the lid (HOT), pull up the loaf by the paper, and gently lower it into the HOT Dutch oven.
Close the lid and put the Dutch oven back into the oven.
Note: Be careful when handling the Dutch oven because it’s scorching hot.
Bake with the lid at 450°F or 230°C for 25 minutes.
Tip: The bread should almost look like steamed at this point.
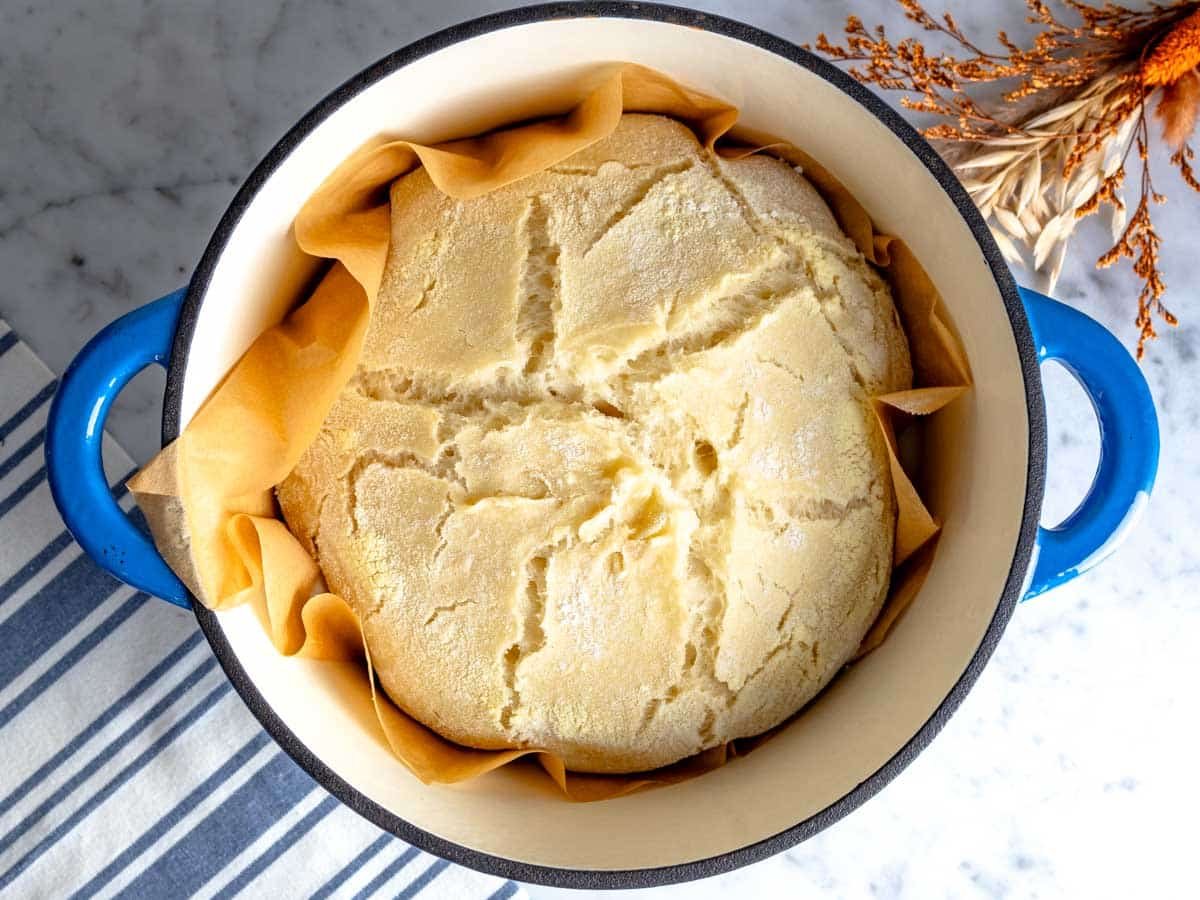
Remove the lid and bake uncovered for 25 more minutes at 400°F or 200°C.
Take the loaf from the Dutch oven and let it cool down on a cooling rack.
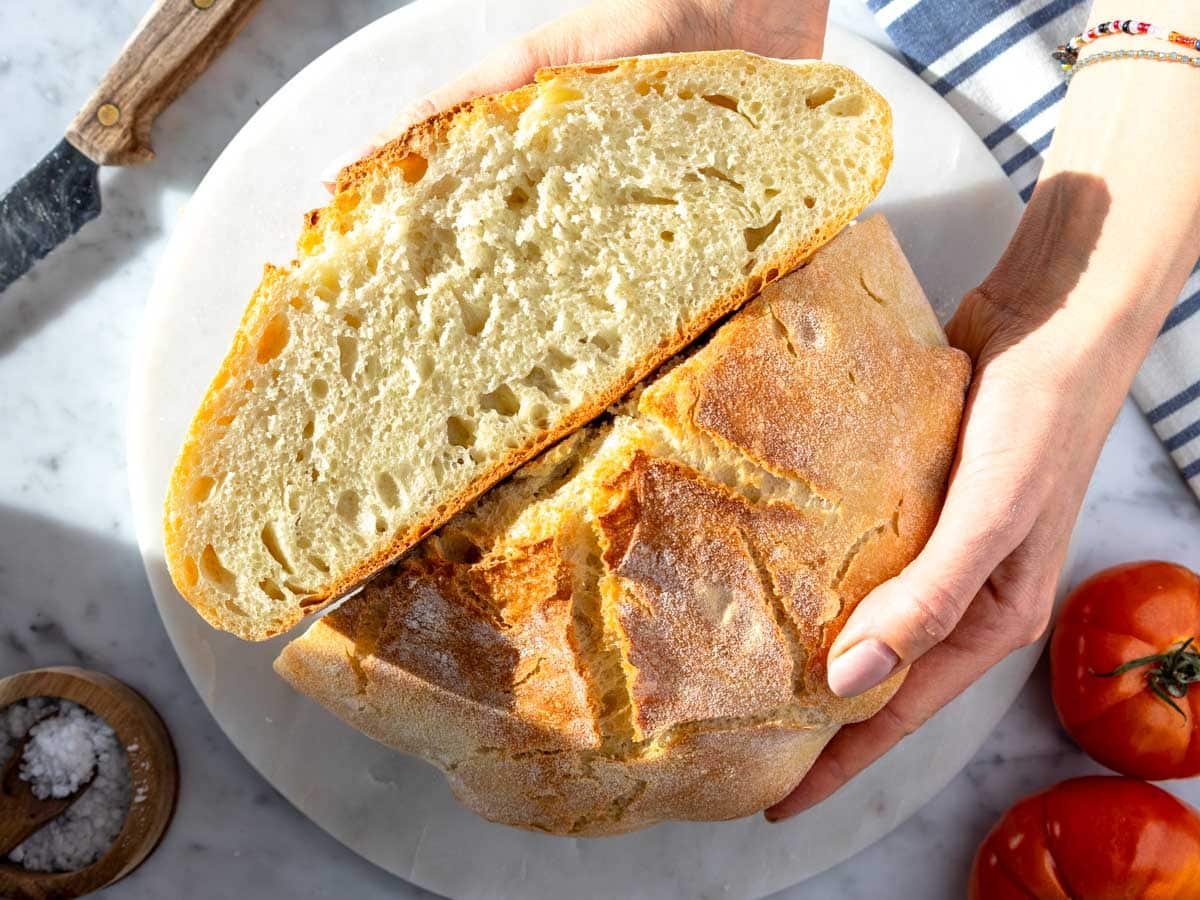
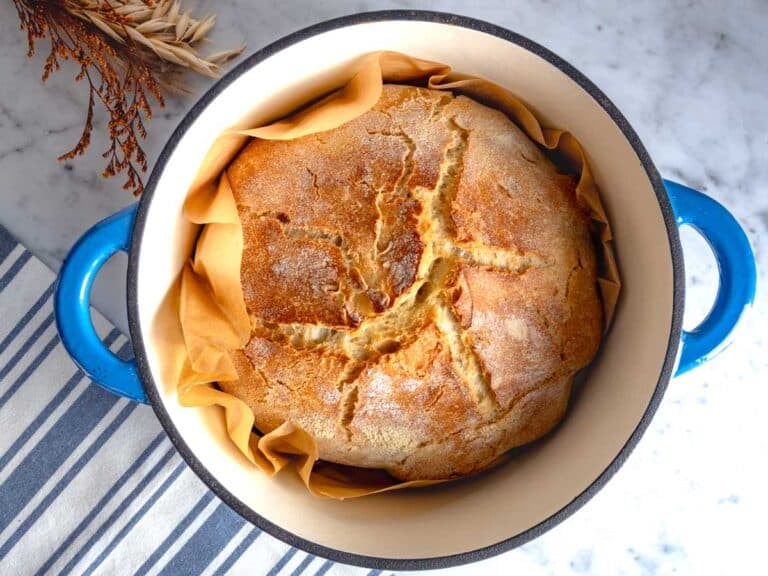
Note: The bread should be ready after 50 minutes. The crust should be golden brown.
The internal temperature should reach 210°F or 99°C. You can check the internal temperature with a kitchen thermometer. If you knock on the bottom, the bread should make a hollow sound.

Questions
You can make bread using regular all-purpose flour instead of bread flour. If you do so, we recommend choosing a flour with more than 11.5% protein content.
Also, since regular flour is less strong (it has less protein) than bread flour, we recommend opting for the short-proofing method. The dough will likely not hold together if it is proofed overnight in the fridge.
Generally, flour with a higher protein content (12% to 15 %) is best for making bread.
Gluten, a protein, gives bread its structure, and as a general rule of thumb, more protein equals better structure.
Two crucial advantages of flour with high protein content are: 1) The flour absorbs more water, allowing you to make a lighter, open-crumb bread, and 2) The flour can withstand longer proofing time (fermentation in the fridge), making for a more flavorful bread.
Depending on how you make it, homemade bread can last from 2 days to more than a week. The quicker the bread is made, the faster it will dry out and stale.
Homemade sourdough bread can last up to 10 days thanks to its acidity and slow fermentation, which produce healthy bacteria that act as natural preservatives.
The best thing about making bread at home is that you can mix different types of flour.
Our advice, at least when starting, is to keep 90% bread flour and 10% special flour such as whole wheat flour, semola flour, or rye flour.
Storage
Room temperature: Let the bread cool down, then store it in a plastic bag for up to 4 days. The plastic helps the bread stay moist but softens the crust. We recommend reheating the bread slices from the second day onward.
Freezer: Let the bread cool completely, then freeze it in a freezer-friendly bag. You can freeze it whole, cut it in half, or slice it. It keeps for 3 months.
Thaw and reheat: Thaw bread at room temperature. Reheat in the oven, toaster, or air fryer.
Similar recipes
MORE BREAD RECIPES: Focaccia pizza, flatbread pizza, schiacciata, vegan cornbread, naan bread, quick pizza dough, ooni pizza dough, classic pizza dough, Neapolitan pizza dough.
Homemade Bread (No-Knead)
Equipment
- 1 Dutch oven or pot that can go in the oven for cooking the bread.
- 1 Bread basket or a colander and a kitchen cloth.
Ingredients
- 3⅓ cups bread flour or all-purpose flour*
- 1½ cups lukewarm water
- 2 teaspoons instant dry yeast
- 1 tablespoon salt
- 1 teaspoon sugar
- 2 tablespoons rice flour optional for dusting the bread basket. Substitute regular flour.
Instructions
MAKE THE BREAD DOUGH
- MIX THE INGREDIENTS: To a large mixing bowl, add 1½ cups lukewarm water, 1 teaspoon sugar, 1 tablespoon salt, and 2 teaspoons instant dry yeast.Whisk until the yeast is dissolved.Add 3⅓ cups bread flour and stir with a wooden spoon until a shaggy dough forms. The water should absorb all the flour.
- FIRST PROOFING: Turn your oven on for 30 seconds, then turn it off. We use the oven as a proofing chamber.Cover the bowl with a lid or plastic wrap and let it proof in the lightly warmed oven for 1.5 to 2 hours or until it doubles in volume.
- FOLDING: Dust your proofing basket with 2 tablespoons rice flour or regular flour.If you don’t have a proofing basket, use a sift lined with a clean kitchen cloth.Fold the proofed dough in the bowl with a spoon over itself 20 times (it takes 30 seconds), moving from the outside to the center of the dough.
- SECOND PROOFING: After folding, transfer the dough onto the floured proofing basket, folded side facing up.You can pinch the dough four or five times to seal the top and tighten its structure.Put the basket in a plastic bag (I use a large freezer bag) and let it proof again.QUICK PROOFING: 45 to 60 minutes at room temperature or in a slightly warm oven. The dough should grow by about 50%.SLOW PROOFING: 8 to 16 hours in the fridge.
BAKE THE BREAD
- PREHEAT OVEN: Put the Dutch oven with the lid on inside the oven on the lowest rack.20 minutes before the second proofing is complete, preheat the oven to 450°F or 230°C with the Dutch oven inside.PREPARE LOAF: Remove your bread basket from the plastic and place a sheet of parchment paper over the dough.Gently turn the basket onto your worktop so the dough falls onto the parchment paper.With scissors, cut a small hole at the center of the bread. Also, cut off excess baking paper.
- PUT IN DUTCH OVEN: Now, carefully remove the Dutch oven from the oven (HOT) and put it on a coaster on your worktop or stovetop.Open the lid (HOT), pull up the loaf by the paper, and gently lower it into the Dutch oven.Close the lid (HOT) and put the Dutch oven back into the oven.
- BAKE: Bake with the lid for 25 minutes at 450°F or 230°C.Remove the lid and bake uncovered for 25 more minutes at 400°F or 200°C.
- LET COOL DOWN: Remove the loaf from the Dutch oven and let it cool down on a cooling rack before cutting it.







Thanks for this easy recipe!
It says “1 sugar”. Do you mean 1 gram sugar, or 1 tsp sugar or maybe 1 TBSP sugar?
Hi Keram, I’m not sure what you mean. If you go to the recipe box (at the end of the page) you will see the list of ingredients and detailed instructions (which says 1 teaspoon of sugar). Find the recipe box here: https://theplantbasedschool.com/homemade-bread/#wprm-recipe-container-111233
I hope that this helps! Kindest,
Louise
Thanks Louise,
Actually in the recipe box it says just ‘1 sugar’
see here:
https://i.postimg.cc/KvYXqgV1/1-sugar.jpg
Now discovered that when I view the same page in different browser (not in Brave) it says ‘1 teaspoon of sugar’
Now I figured out the ‘problem’
It says ‘ 1 teaspoon of sugar’ in the USA box but in the ‘Metric’ it says just ‘1 sugar’
You are so good! Yes, I corrected it now. Thanks so much for your help, this really improves the reader experience. Have a great Friday!!
Interesting recipe. Making no kneed bread with out the sugar. I will make and report as I have been unhappy with mine. It’s too dense.