This chocolate custard is an easy recipe with a rich chocolate flavor and a creamy, velvety texture.
Our recipe is without eggs and butter and suitable for gluten-free diets.
You can make this easy dessert recipe with five simple ingredients, including your dark chocolate of choice.
Don’t Lose This Recipe
Table of Contents
A recipe for chocolate lovers
Prepare yourself for a creamy and indulgent chocolate treat. This recipe is one of our easiest desserts and counts a few ingredients.
This custard is a 5-minute mouth-watering variation of our egg-free vanilla custard.
Chocolate custard follows the same simple steps but adds chopped dark chocolate, which melts and mixes with the custard base.
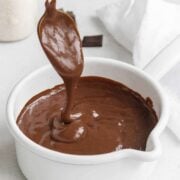
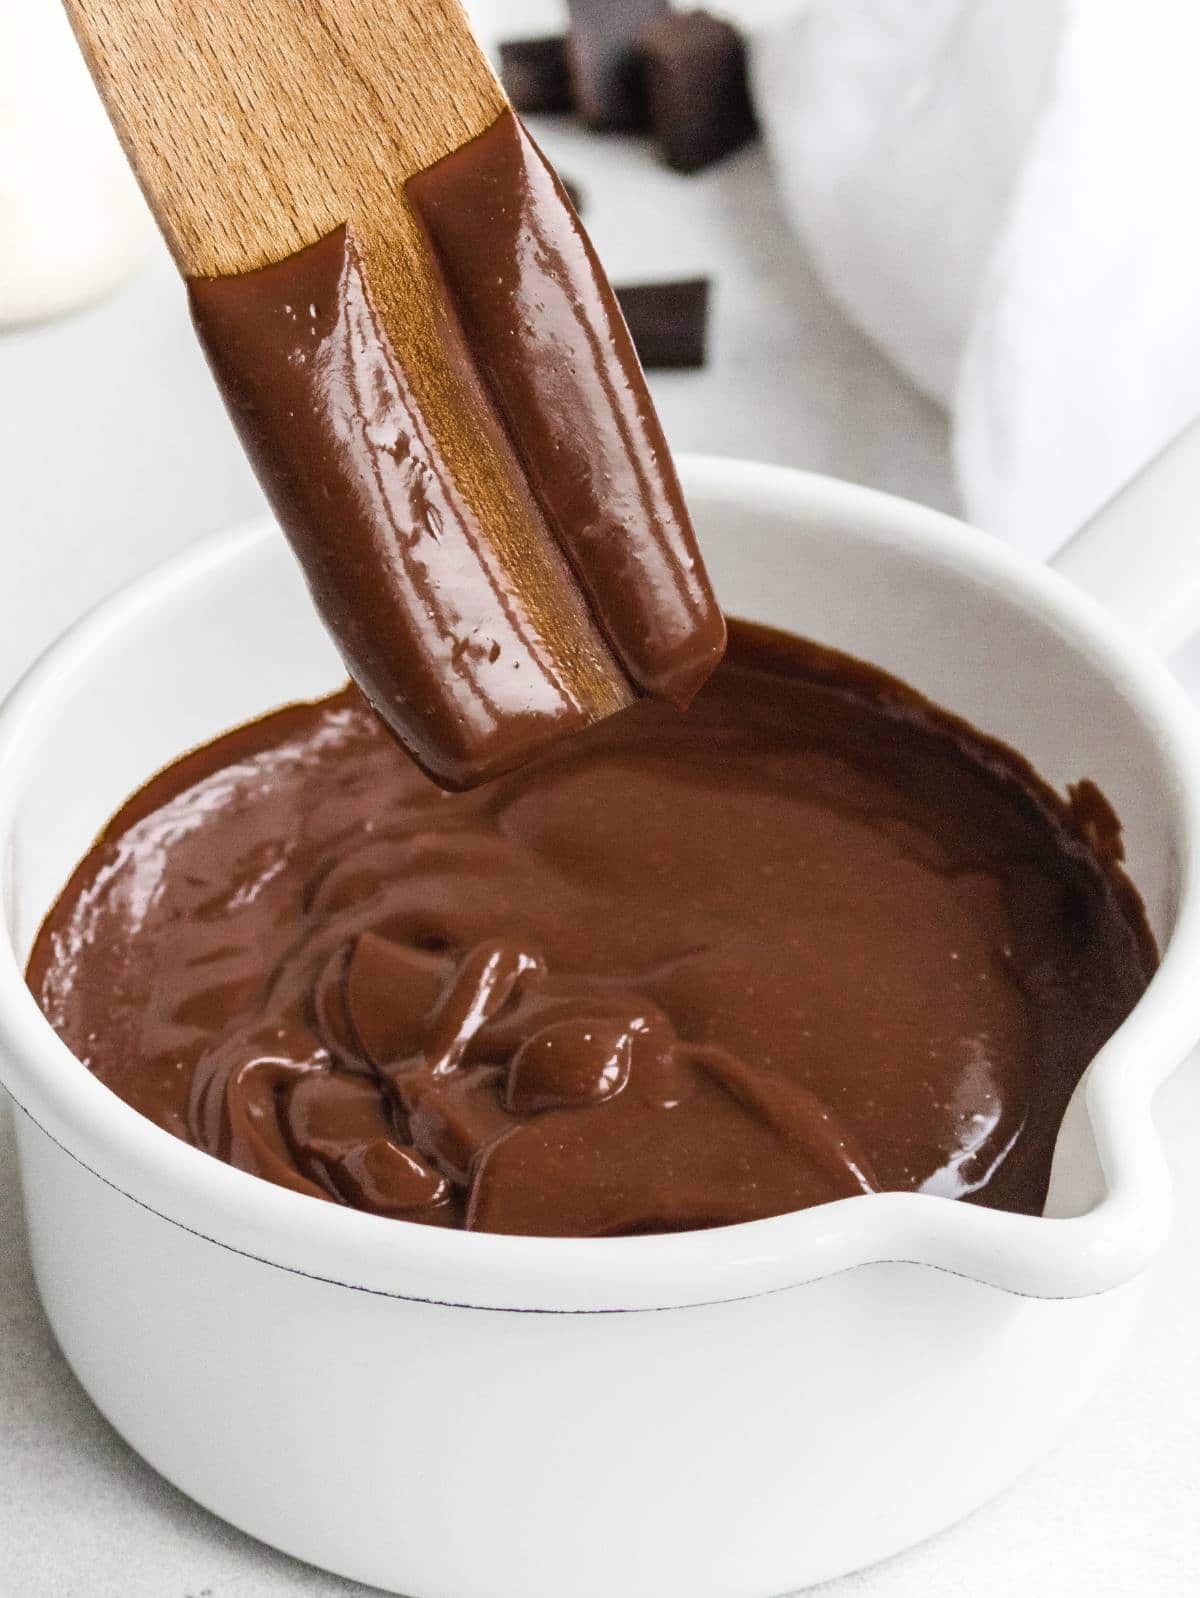
You will get a thick but not too firm cream with a smooth and velvety consistency.
Chocolate custard is wonderful for enriching other sweets.
We have tested it (and loved it) in vanilla cake and added a dollop to egg–free pancakes.
It’s also excellent to fill bomboloni or as the filling in strawberry tart.
For chocolate lovers who want a quick and easy treat, this custard is a great way to satisfy your cravings.
Louise and I enjoy the simplicity of chocolate custard with a spoon, a finish of whipped cream, and a strawberry.
Ingredients

- Milk: you can make this recipe with any type of milk. We tried almond, oat, soy, and rice milk.
- Sugar: you can use white or brown sugar.
- Dark chocolate: pick your favorite dark chocolate brand. We recommend one with a percentage of cocoa of 50% plus; even better if it’s 70% plus. Substitute chocolate chips for dark chocolate.
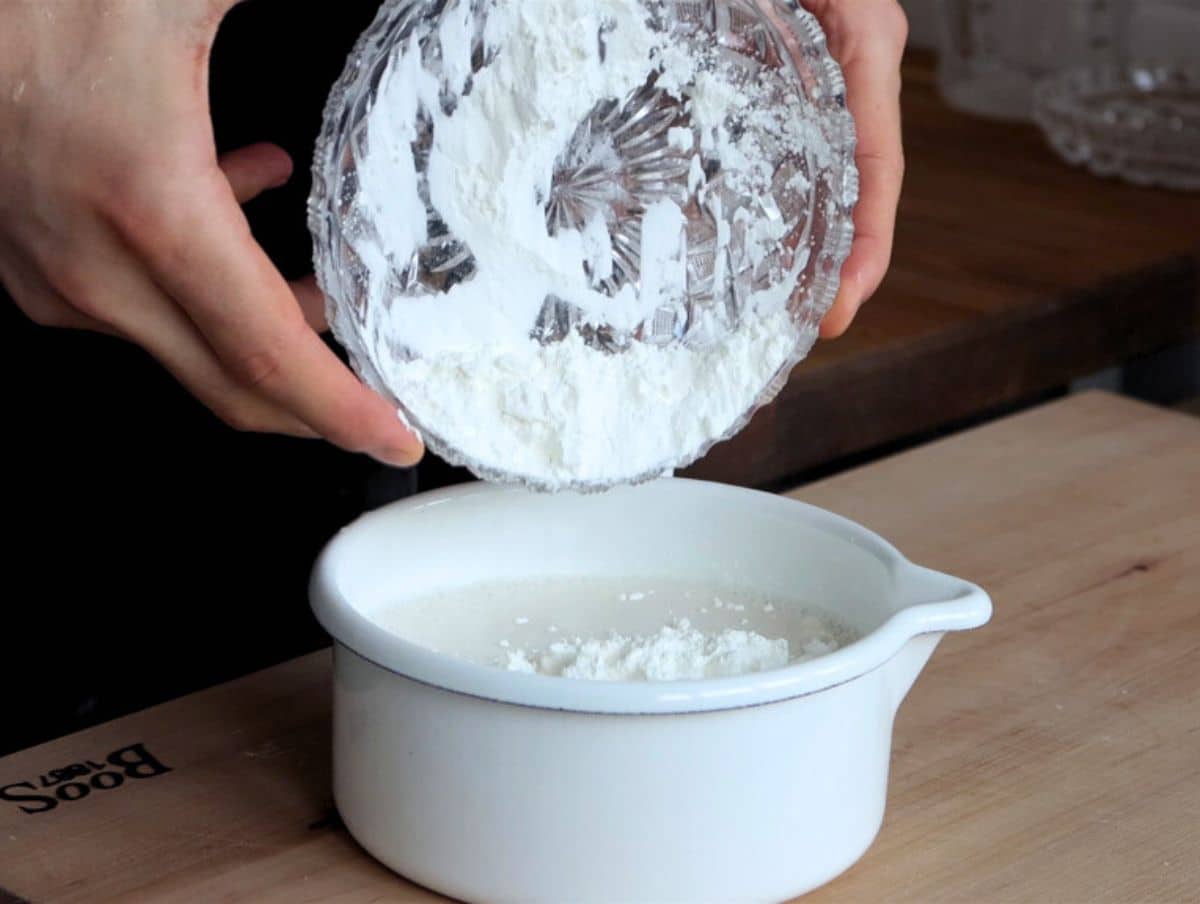
- Cornstarch: to thicken the custard. Substitute potato start for cornstarch.
- Vanilla extract: for a light vanilla aroma, which is delicious with chocolate.
How to make chocolate custard
Chop the chocolate into small pieces. I recommend doing this on a cutting board with a sharp knife. Set aside.
To a saucepan of the heat, add milk, sugar, cornstarch, and vanilla extract.
Whisk until smooth.
Tip: when adding cornstarch to a liquid, the liquid should always be cold and off the heat to help the cornstarch dissolve and prevent lumps.
Bring the saucepan on the stovetop and set it to medium heat.
Now stir for 2 to 3 minutes until the liquid thickens into a custard.
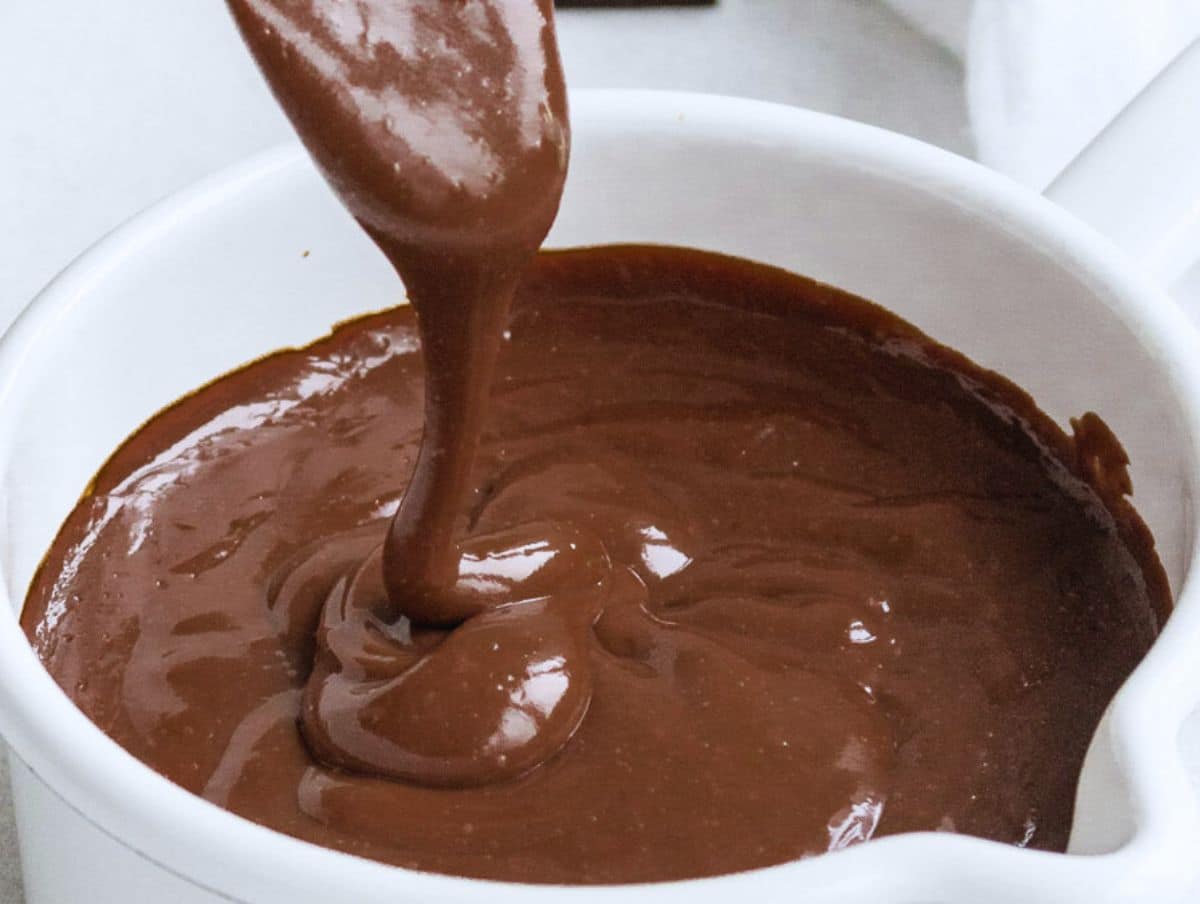
Remove from the heat and add the dark chocolate chopped into small pieces.
Tip: smaller batches take less time while bigger batches can take up to 5 minutes.
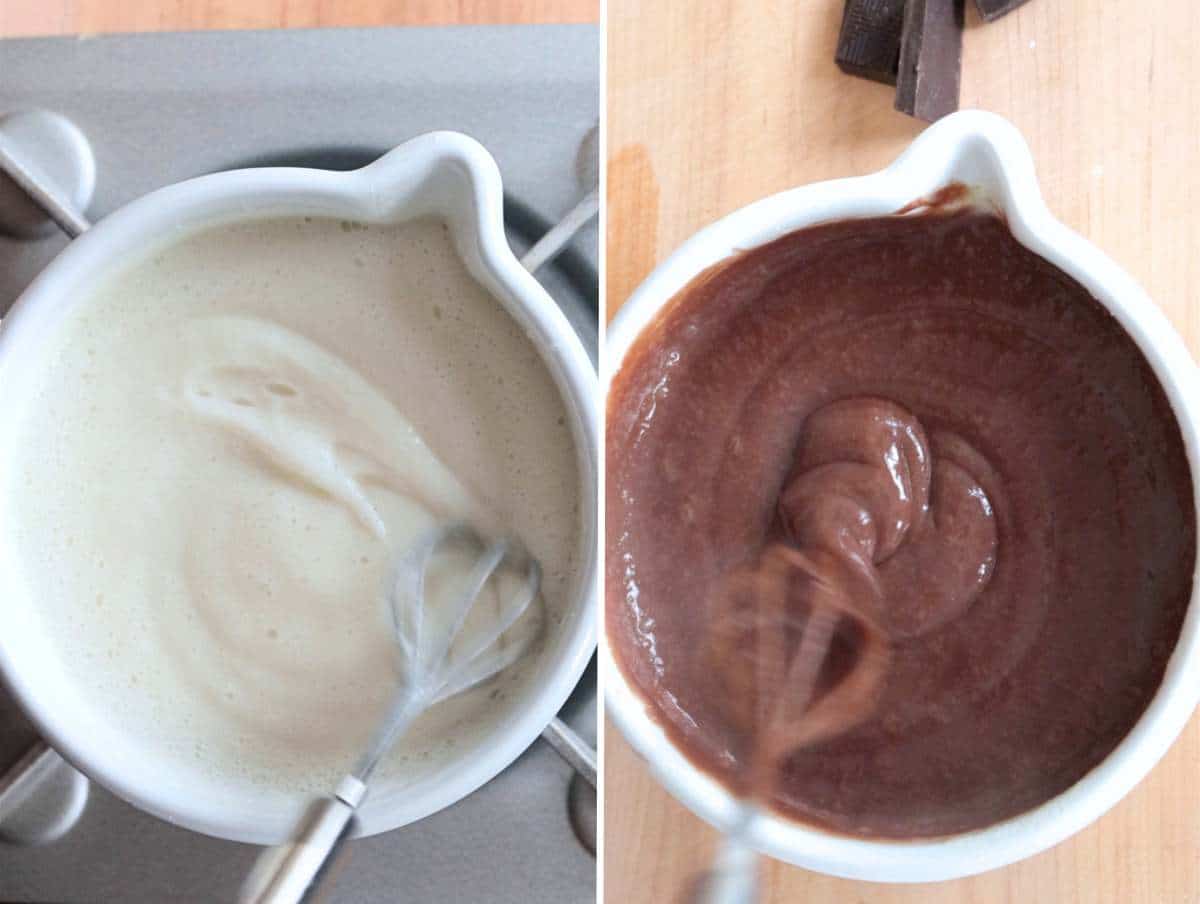
Stir for one more minute. When the chocolate is fully melted, your custard is ready.
Tip: the custard keeps thickening as it cools down, so my advice is to remove it from the heat a few seconds before you think it is ready.
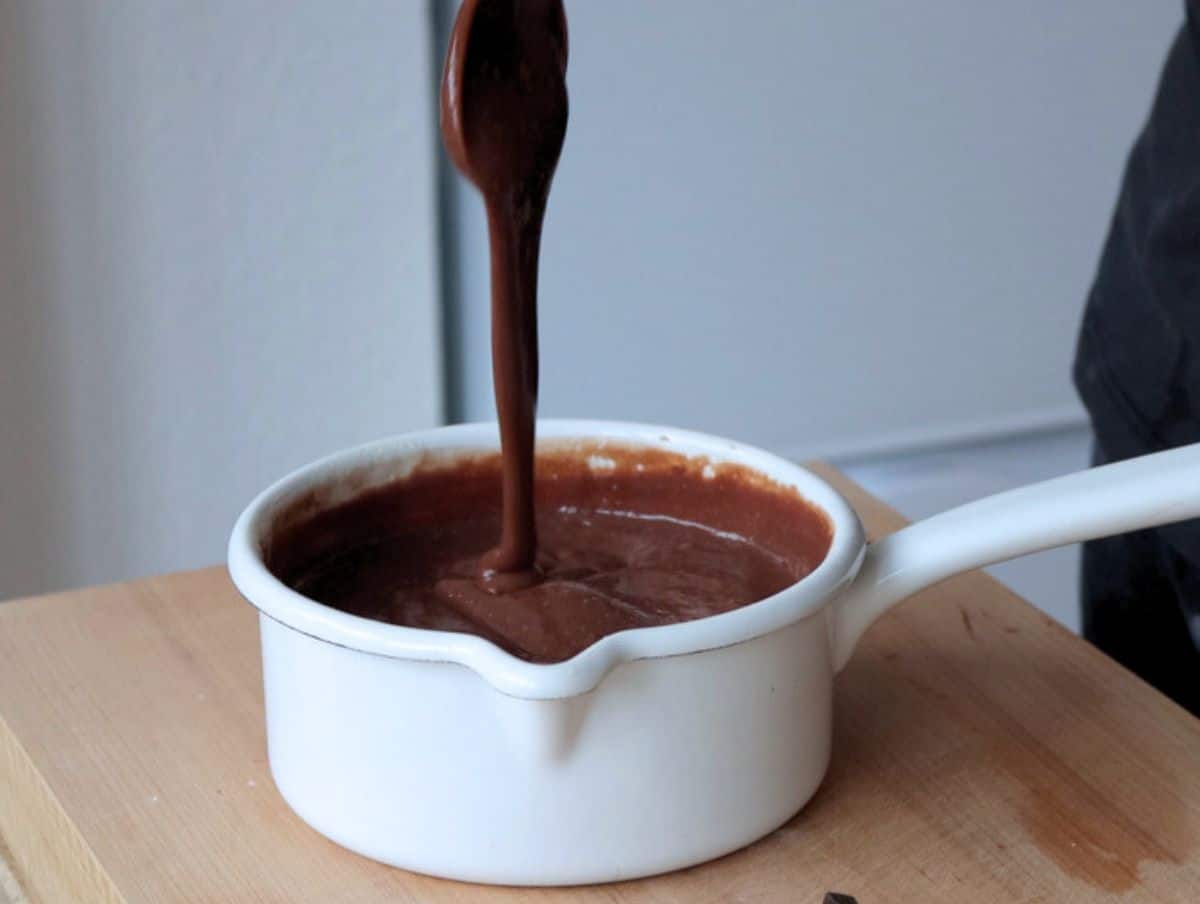
If you’d like a thicker chocolate custard, keep cooking it for one more minute. If you want a thinner one, take it off the heat earlier.
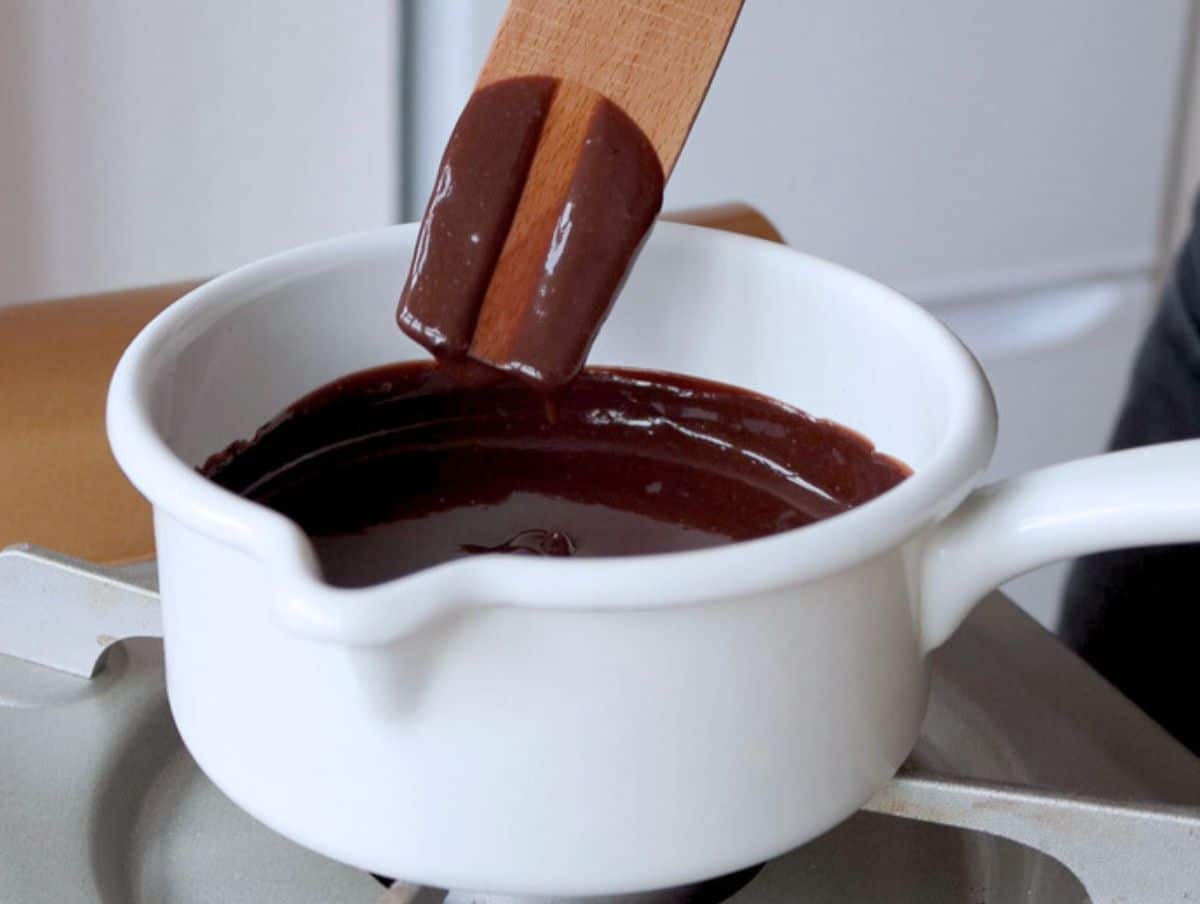
Tip: To check if your custard is ready take a wooden or silicone spatula, dip it in the custard, then run a finger through it. If the spatula stays clean, the custard is ready.
How to cool it?
Before storing chocolate custard, you must bring it to room temperature quickly and while stirring.
I know it sounds tedious, but it’s actually pretty fast; plus, if you don’t do it, the custard will form a thin layer or a thin skin on top that will make it lumpy.
The best and fastest way to cool it is to transfer it to a cold glass or metal bowl.
Now put the bowl bain marie inside another bowl or pot filled with cold water and whisk it until you reach a lukewarm temperature.
Now cover it with plastic wrap and store it in the fridge. The wrap should touch the custard to prevent a dry layer from forming on top.
Storage
Refrigerator: you can store this chocolate custard in the refrigerator for 3 days.
Let it cool down, then cover it with plastic wrap. Make sure the wrap touches the surface of the custard to prevent a thin crust from forming.
Reheat: you can reheat the custard on low heat by adding a dash of plant milk while stirring.
We do not recommend freezing the custard unless you want to make ice cream out of it.
Troubleshooting lumps after storage: it is possible that during the cooling process, the custard will dry out on the surface, creating a thin skin that will result in annoying lumps.
If you are annoyed by the lumps, you can blend the custard with an immersion blender.
Similar recipes
If you liked this chocolate custard, you might also like:

Chocolate Custard
Ingredients
- 2 cups milk see notes
- 7 tablespoons sugar
- 5 tablespoons cornstarch
- 2 ounces dark chocolate chopped
- 1 teaspoon vanilla extract
Instructions
- PREP INGREDIENTS: Chop 2 ounces dark chocolate into small pieces.To a saucepan off the heat, add 2 cups milk, 7 tablespoons sugar, 5 tablespoons cornstarch, and 1 teaspoon vanilla extract. Whisk until the cornstarch is dissolved.

- COOK AND STIR: Bring the saucepan to the stove top and stir on medium heat until the liquid thickens (2 to 5 minutes depending on quantities).Turn the heat off and add the chopped chocolate. Whisk for 1 more minute or until the chocolate melts.When the chocolate is fully incorporated your custard is ready.
- COOL DOWN: The best and fastest way to cool it is to transfer it to a cold glass or metal bowl.Put the bowl bain marie inside another bowl or pot filled with cold water and whisk it until you reach a lukewarm temperature.


Notes
- Milk: you can use cow’s milk or non-dairy milk such as soy, almond, oat, and rice milk.
- Sugar: you can use white or brown sugar.
- Dark chocolate: you can substitute your favorite chocolate for dark chocolate. Keep in mind that if you use a sweet chocolate you might want to reduce the sugar in the recipe.
- Cornstarch: you can substitute potato starch.
- Vanilla extract: you can substitute orange aroma or zest, or you can use both orange and vanilla extract.
- Refrigerate up to 3 days after cooling, with plastic wrap touching the surface to prevent skin formation.
- Not suitable for freezing.
- Reheat on low heat with a little plant milk, stirring.
- If lumps form during storage, use an immersion blender to smooth them out.
- Always add cornstarch to a cold liquid off the heat to prevent lumps formation.
- Smaller batches take less cooking time while bigger batches can take up to 5 minutes.
- The custard keeps thickening as it cools down, so my advice is to remove it from the heat a few seconds before you think it is ready.
- To check if your custard is ready take a wooden or silicone spatula, dip it in the custard, then run a finger through it. If the spatula stays clean, the custard is ready.
Nutrition
Don’t Lose This Recipe
You might also enjoy:

Collections
30 Easy Italian Recipes

Collections
35 Easy Desserts
Collections
35 Vegetarian Thanksgiving Recipes
Collections