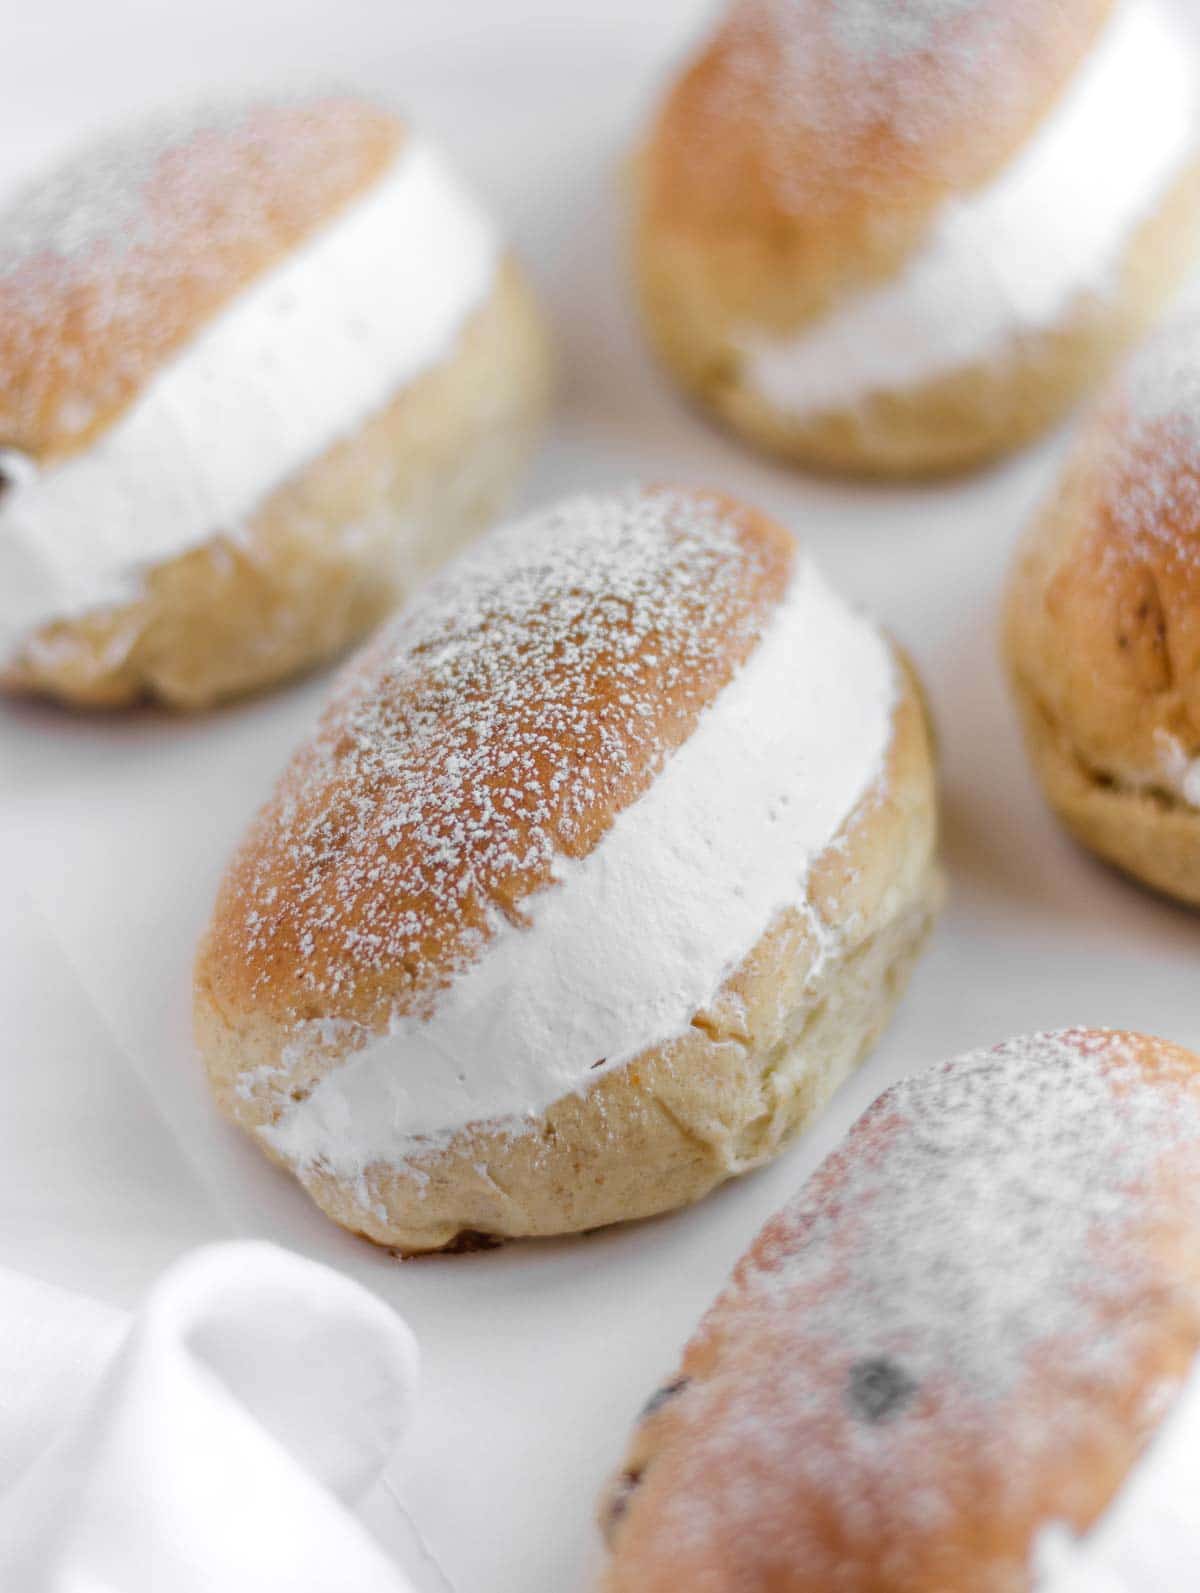
This vegan Italian cream buns recipe comes straight from central Italy where I grew up and they taste and look exactly like authentic Italian “maritozzi con la panna”.
We don’t use eggs, butter, milk or any other animal-based product. Just simple plant-based ingredients to make this delicious Italian treat healthier, sustainable, and most importantly delicious!
Don’t Lose This Recipe
Table of Contents
What are maritozzi?
The maritozzo is basically sweet cream brioche bun popular in the central regions of Italy, consisting of a small loaf of brioche made with flour, eggs, honey, butter and salt that is cut in half, and often filled with whipped cream.
As a kid I would eat maritozzi every single Sunday after the obligatory church service in the exact same bakery in my hometown. There was no other way to make me attend church service to be honest.
Fast forward 24 years and still today I have that same cream bun flavour impressed in my memory. And so I decided to make them at home, but vegan.
There are many different variations of maritozzi in Italy, but I assure you that our vegan maritozzi filled with vegan whipped-cream are 100% authentic in looks and flavour, just like we eat them in central Italy.
For other delicious vegan Italian brioche recipes, have a look at our:
- Italian croissants with vegan custard (cornetti)
- Vegan brioche bread (pan brioche)
- Chocolate chip braided brioche (treccine)
- Italian donuts (ciambelle)
- Jam stuffed donuts (bomboloni)
- Breakfast brioche with jam (buondì)
Ingredients & Substitutions
- Flour: I use bread flour. That is basically a flour that is less refined than all-purpose, but not as heavy as whole-grain flour. If you can’t find bread flour you can use all-purpose flour or a 50-50 mix between all-purpose and whole-grain flour.
- Sugar: plain sugar works best. No syrups or other sugar types.
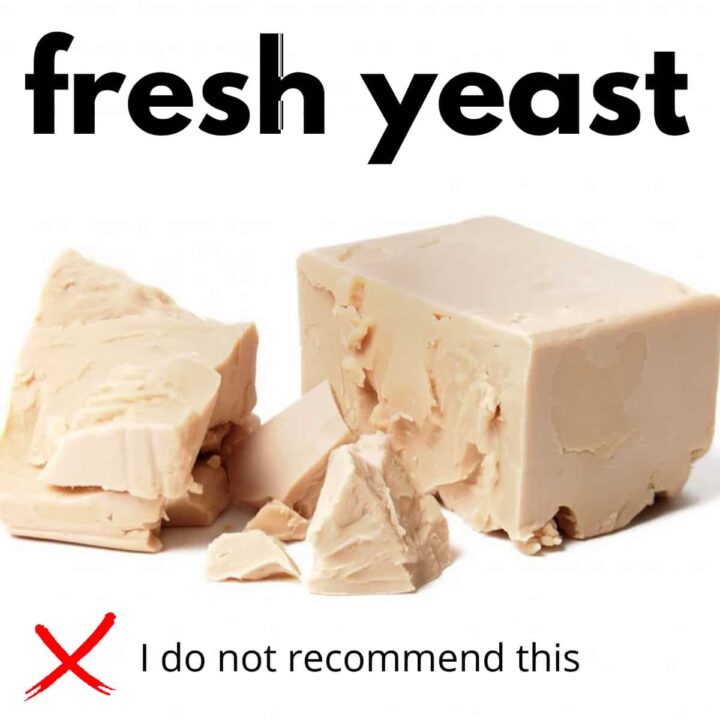
- Instant dry yeast: I love instant dry yeast because you don’t have to mix it with water to activate it. You can replace it with fresh yeast but if you do so you need 3 times more fresh yeast compared to our instant dry yeast dose.
- Soy-milk: this is our go-to milk for cooking. You can replace it with any other plant milk of your choice.
- Sunflower oil: this is our go-to fat because it is comparatively healthier than coconut oil, and because it has little flavour, it’s affordable and widely available.
- Raisins: they are used in the original recipe that I ate as a kid so I added them in. They are delicious in maritozzi. However, in some regions in Italy you won’t find raisins in maritozzi.
- Vanilla extract and orange zest: necessary for the authentic maritozzi flavour. Better if the orange is organic.
Equipment
You’ll need a large clean bowl and a clean worktop to make this recipe. If you filled them with vegan whipped cream you’ll also need an electric whisk to whip the cream and a pastry piping bag to fill these vegan Roman buns.
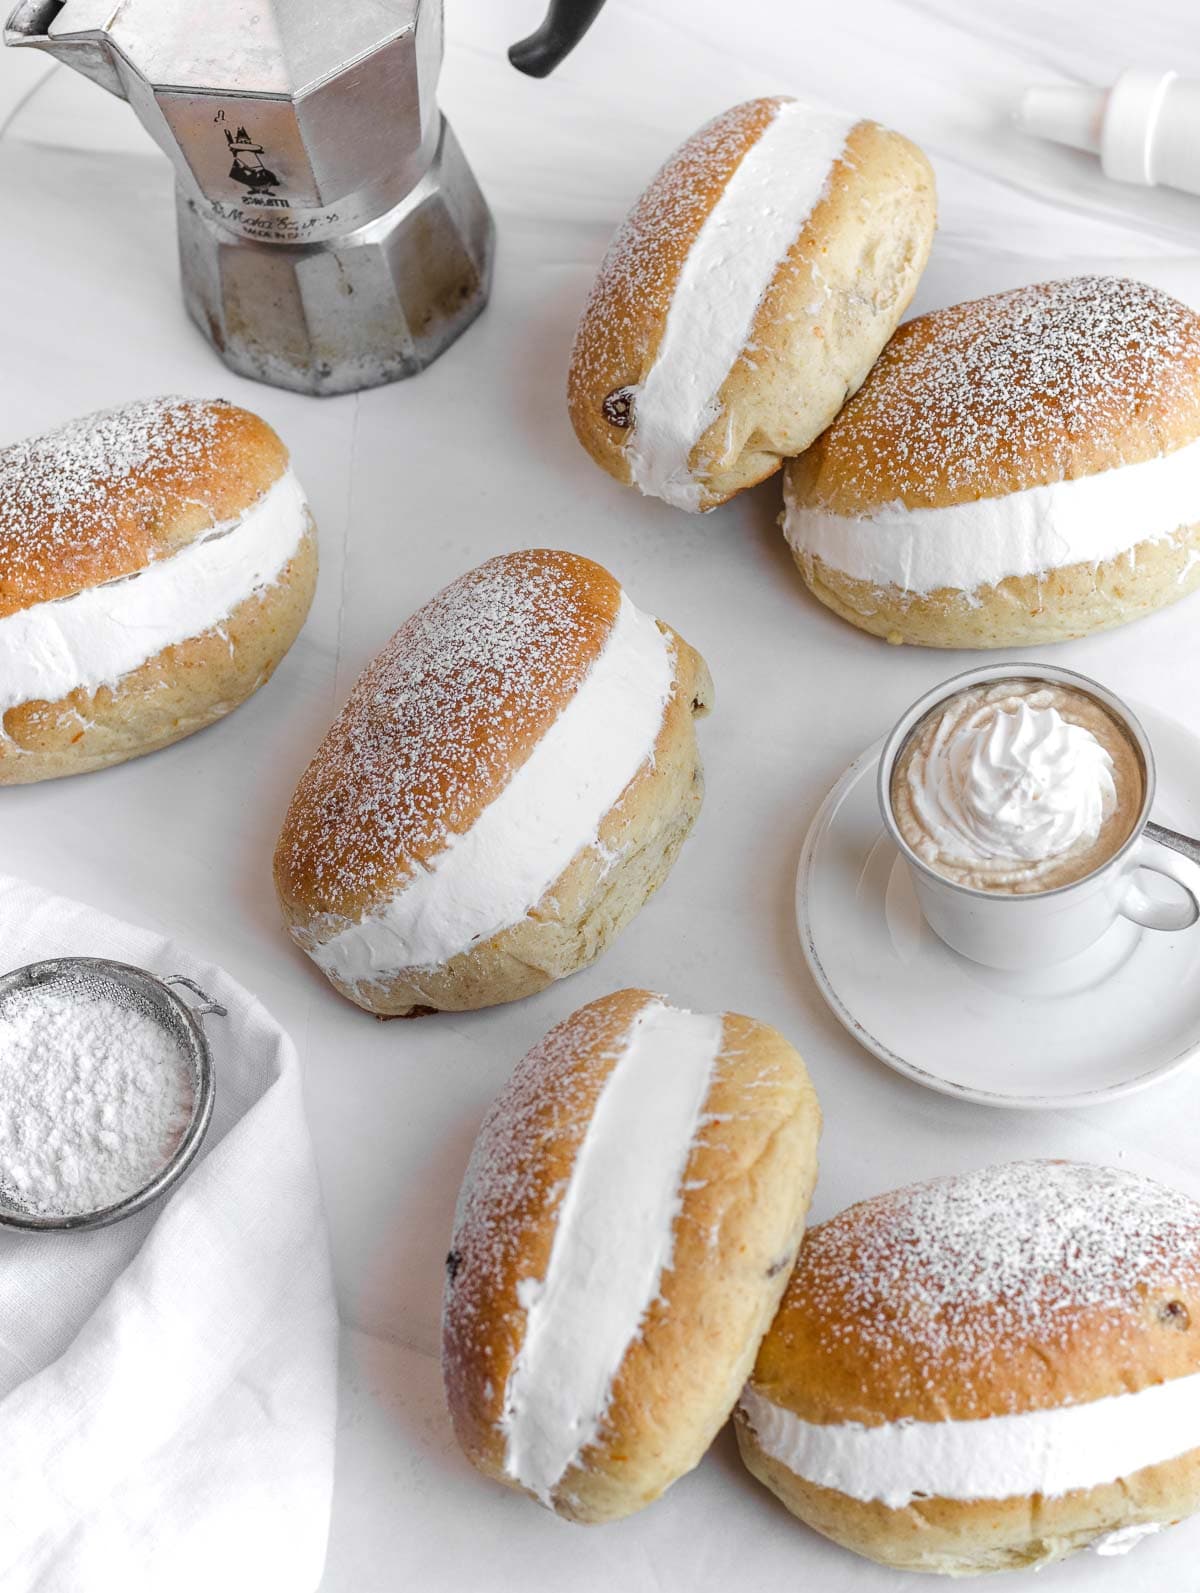
How to fill cream buns
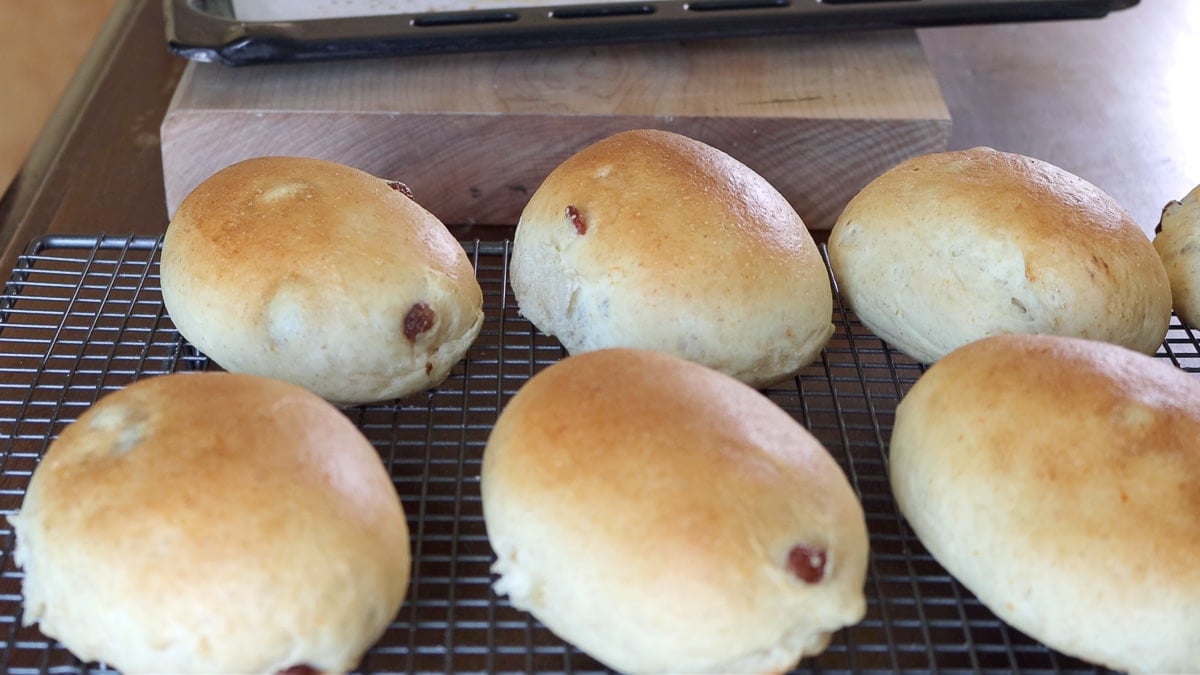
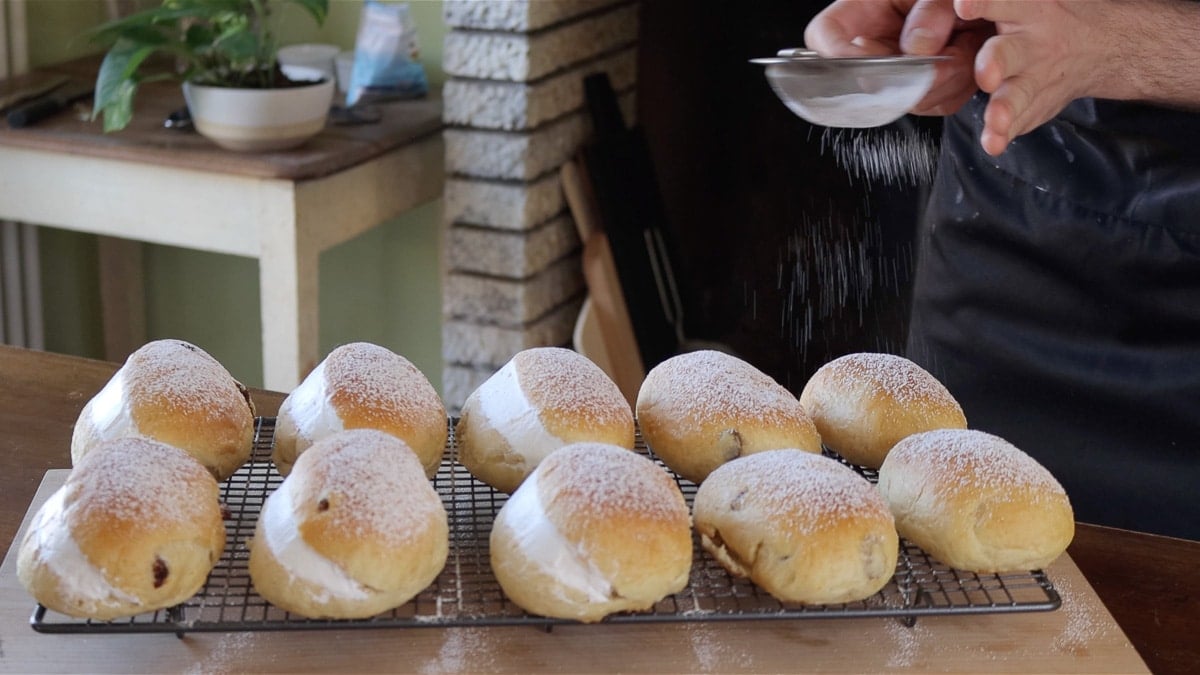
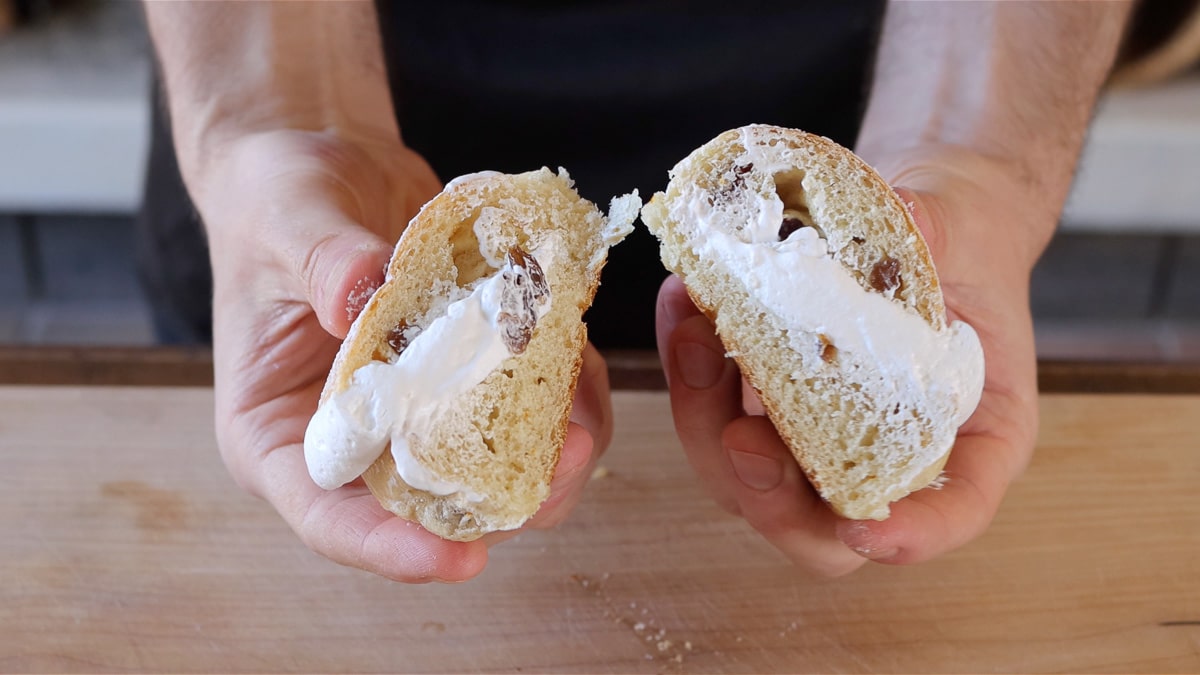
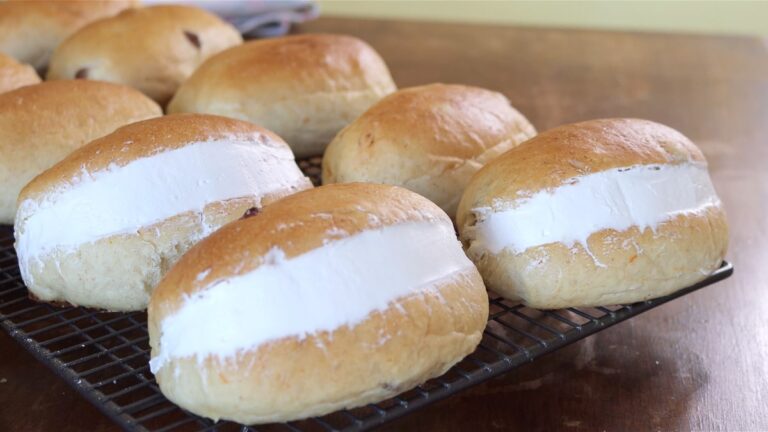
1. Wait for the buns to cool completely: It’s easier to cut the buns when they are cold. Also, you shouldn’t put cold whipped cream into a warm bun. It will melt. I like to transfer them on a cooling rack to accelerate this process.
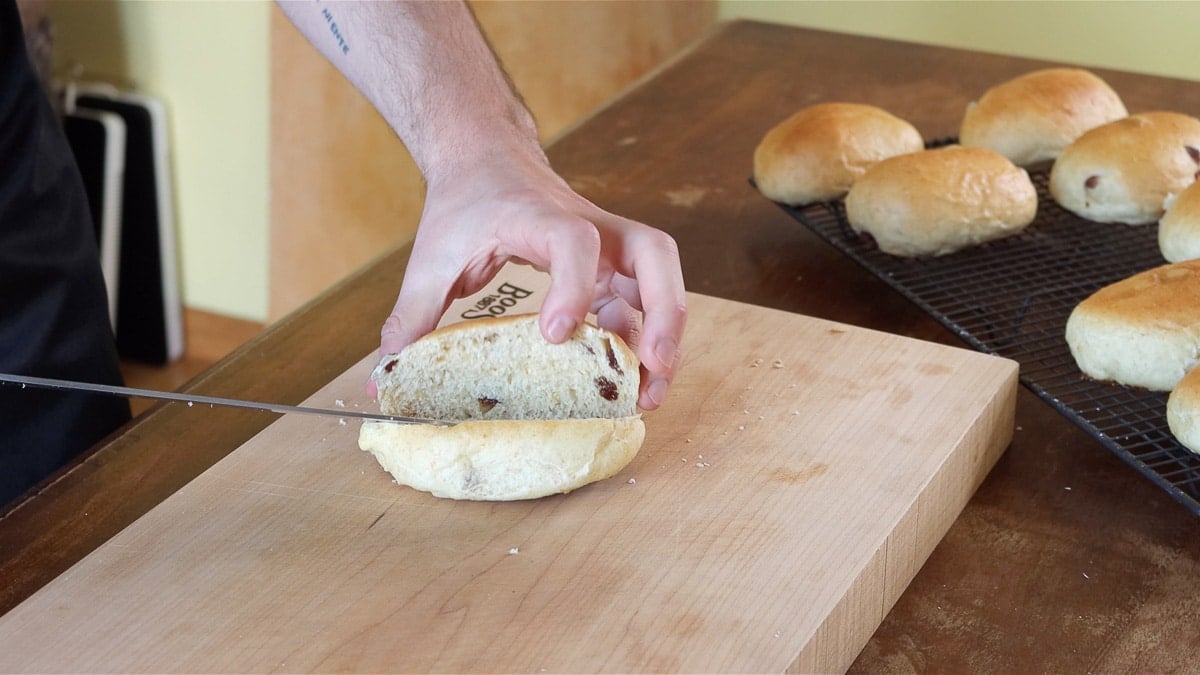
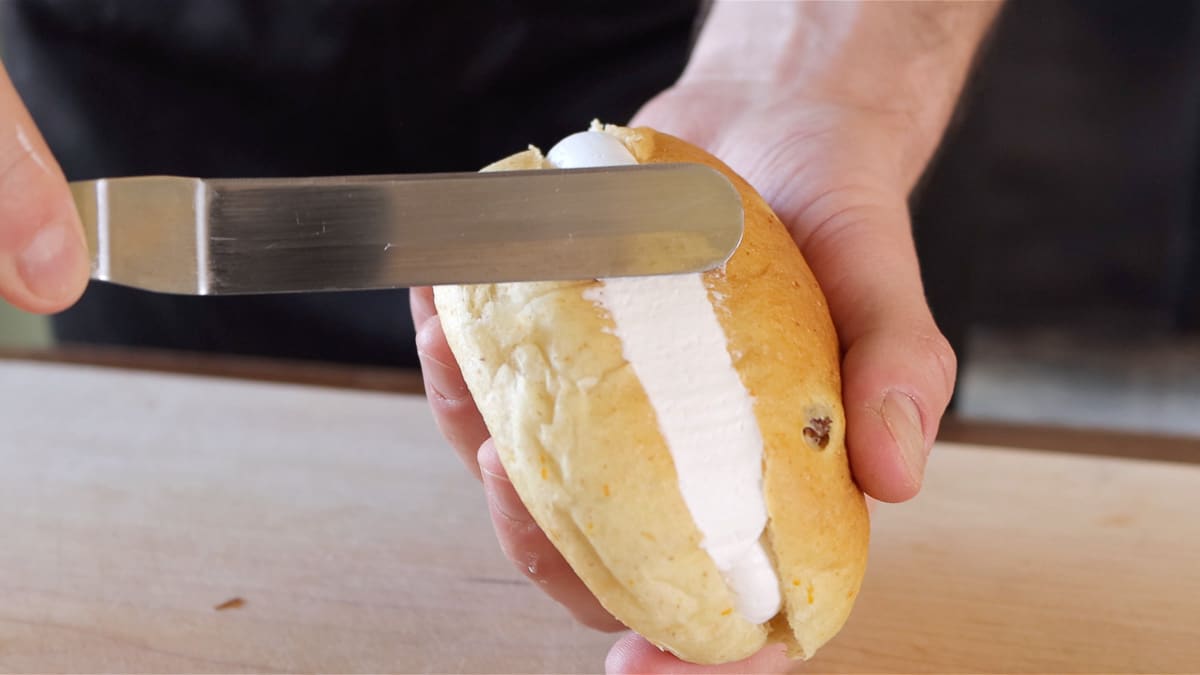
2. With a serrated knife, cut the buns open on the long side: A serrated or bread knife is the best for this job. Don’t cut the bun open completely, only about 75% of it.
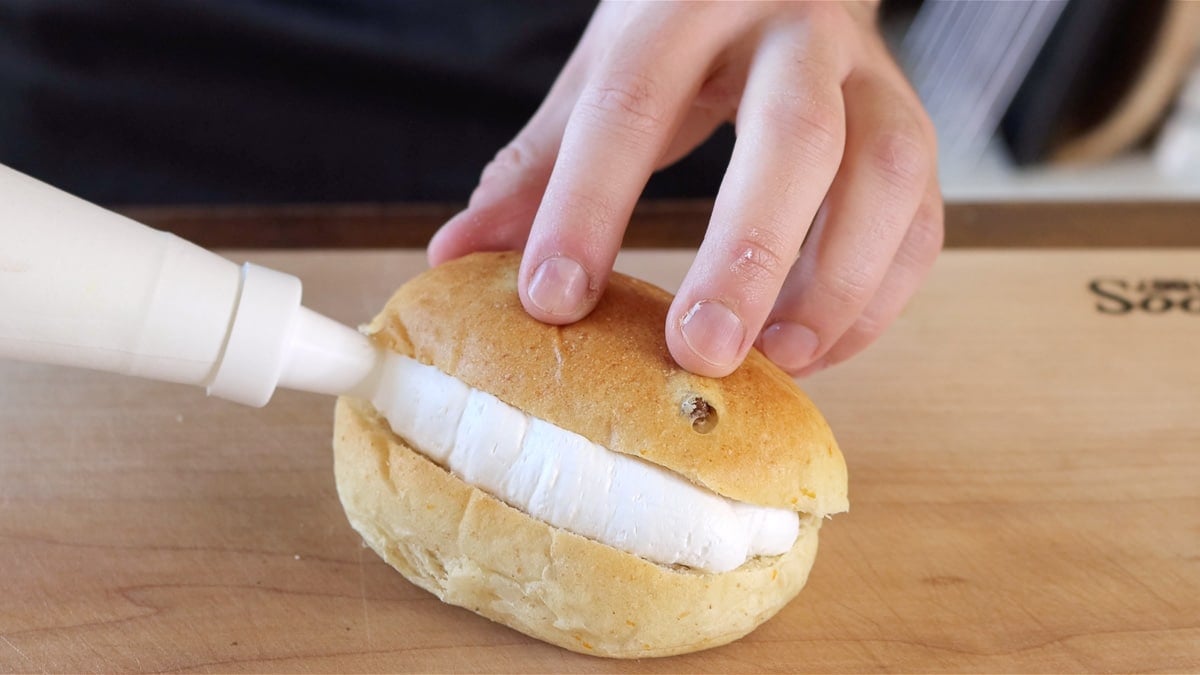
3. Use a pastry piping bag to fill with cream: Squeeze the cream in the bun in stripes. I usually do three stripes of cream in each bun. Be generous. The cream needs to get to the edge of the bun.
4. With a spatula, remove excess cream: To give the Italian look to these vegan cream buns, level-off excess cream from the opening of the maritozzi. You can do this by gently going over it with a flat spatula.
5. Sprinkle with a little powdered sugar: The final step is to sprinkle just a bit of powdered sugar on top of the maritozzi. They should not be completely covered. Just a bit.
Tips
I tested the dough recipe for these vegan Italian cream buns several times, with poolish and without, with fresh and dry yeast, with all-purpose, bread, first clear and whole-grain flours. Ultimately, a good kneading and the right amount of proofing are what will make or break this recipe.
In the end, I decided to make this vegan maritozzi recipe as easy as possible, so that you can make it at home without having any problems. That’s why I don’t use pre-fermentation, poolish, or any other advanced proofing technique. They are just not worth it for everyday-home cooking in my opinion.
There is too much variability based on temperature, humidity and ingredients used, and therefore a high risk of failure.
I want you to make this at home, and get it right and delicious the first time around. And so, all you need to remember to make our vegan maritozzi right are three key things: the yeast, the kneading, and the proofing.
The Yeast
The most common types of yeasts you’ll encounter in home-cooking are fresh yeast, active dry yeast and instant dry yeast. All of them are made of the same thing – yeasts – but due to the different production process they work differently.
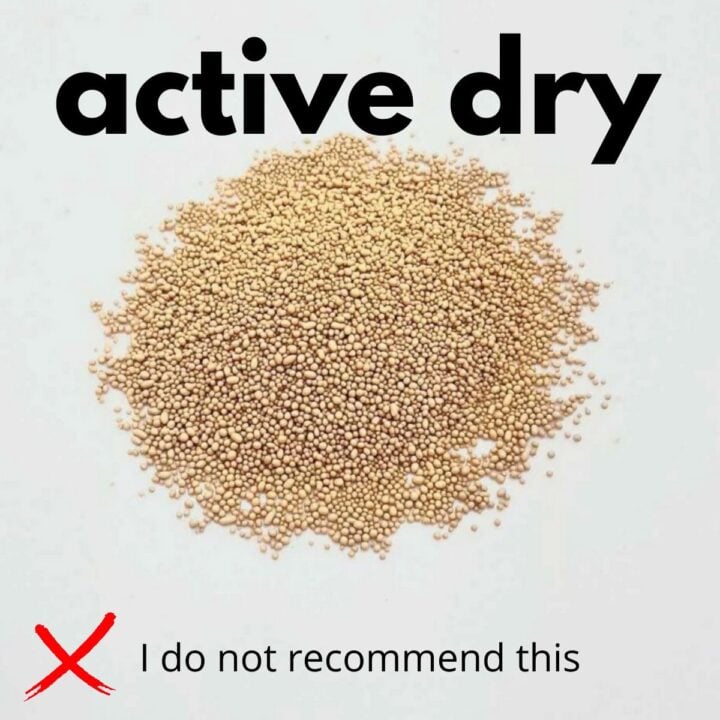
Why I don’t like to use fresh yeast or active dry yeast in my recipes?
Because instant dry yeast is a better, easier to use and more reliable product than either fresh yeast or active dry yeast.
In my experience with this online blog, it is easier for you – the reader – to make a recipe at home when I use instant dry yeast. The success rate is a lot higher!
The inconvenience with fresh yeast (the one that comes in small cubes) and active dry yeast, is that they need to be dissolved and activated in lukewarm water for a few minutes before you can use them. This extra step is where often things go wrong.
If the water is too cold the yeast won’t wake up. If the water is too hot the yeast will die. And if you forget to activate them, they won’t work. Also, due to the way they are manufactured, fresh and active dry yeast spoil faster than instant dry yeast, so you might be dealing with yeast that doesn’t work at all.
Why I like instant dry yeast?
I am a big fan of instant dry yeast for quick, easy and reliable home-cooking. In my experience, instant dry yeast is the easiest yeast to use because:
- it’s very stable
- it doesn’t need to be activated in lukewarm water
- it can be mixed straight into the dry ingredients
- it produces consistent results
- it has a long shelf life, so if you find a brand you like you can buy a lot of it and keep it handy in your pantry.
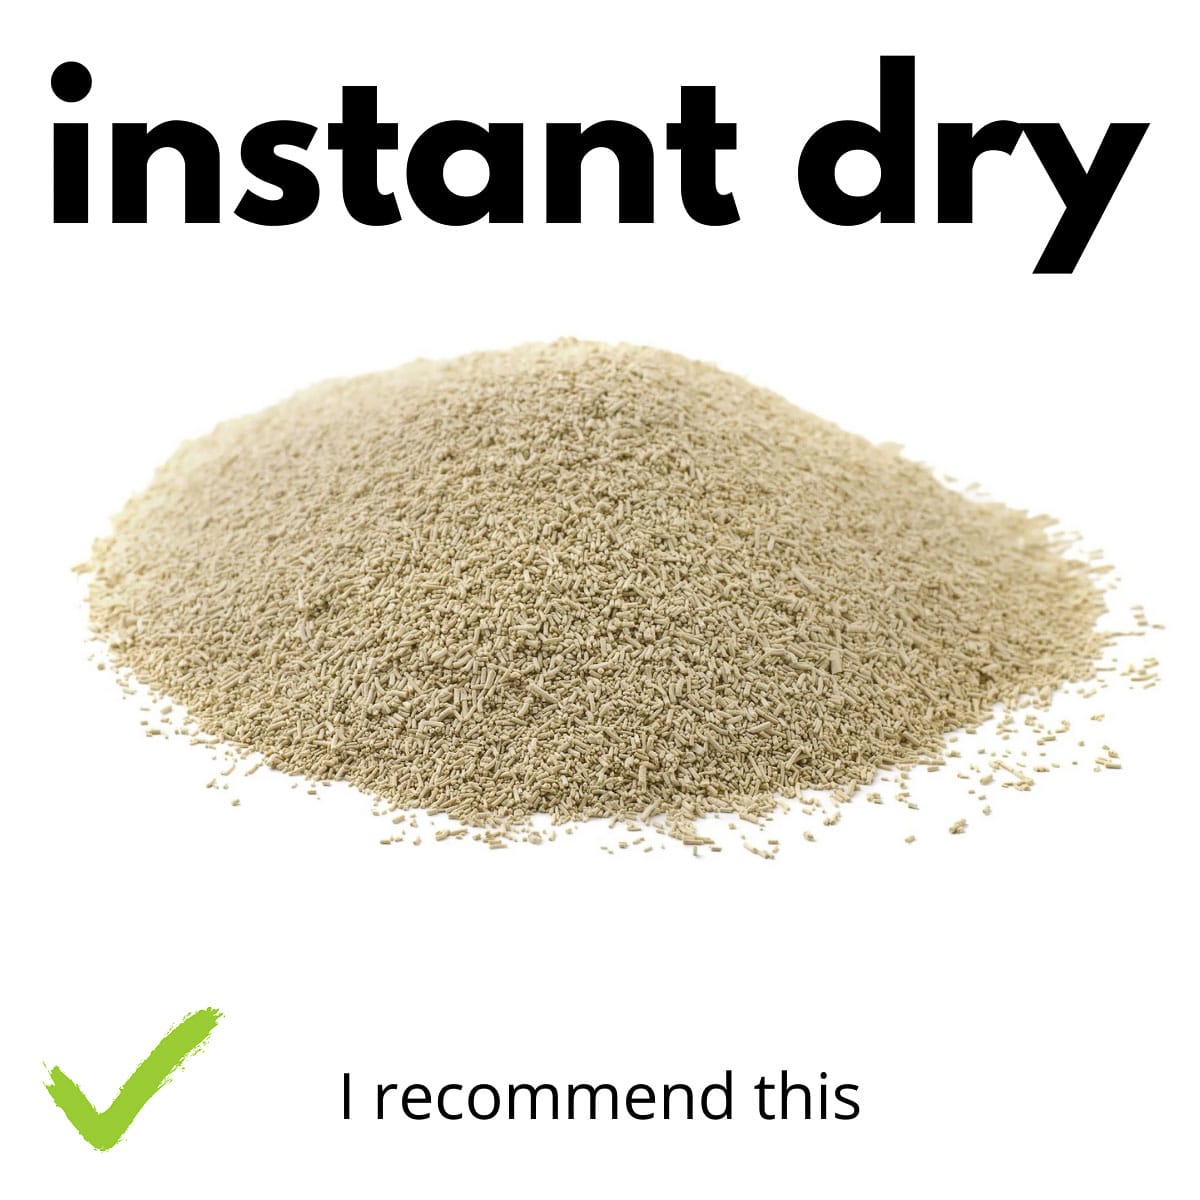
How do I use instant dry yeast?
Instant dry yeast comes in the form of a fine granular dust. To use it, just add it to flour and sugar, stir, and you are done. No dissolving, no activating, no pre-mixing with water.
How and where to find instant dry yeast?
You can find it in the baking section of your grocery store, or online. If you are not sure if it’s instant dry yeast you should read the label and the instructions to make sure you are buying the right one. You see, yeasts are not a regulated food category, and so manufacturers can write whatever they want on the package.
For instance, my favourite brand of instant dry yeast doesn’t even mention the words instant and dry on the package. Other brands, however, do write explicitly that the yeast that you are about to buy is instant dry.
However, all brands write how to use the yeast in the instructions. If it doesn’t need to be dissolved and activated in water, and can be added directly to the flour, then most probably is instant dry yeast.
The great thing about instant dry is that once you’ve found a good reliable brand that you like, you can buy several packages and keep them in your pantry for over a year, ready to use.
What is my favourite instant dry yeast brand?


- PANEANGELI MASTRO FORNAIO: Paneangeli is one of the most popular brands of yeast in Italy. They dominate the supermarkets aisles with many different baking products, but they don’t write “instant dry yeast” on the package. They came up with their own name for it: “mastro fornaio”.
Mastro Fornaio is a really good quality Instant Dry Yeast. It works, always, and it’s perfect for sweet yeasted Roman buns. - DR OEKTER INSTANT DRY YEAST: when I am not in Italy this is what I use. Dr. Oekter explicitly writes the word “instant” on their package, and I love them for that. They even change the language on the package based on the country you are in. And their instant dry yeast is great!
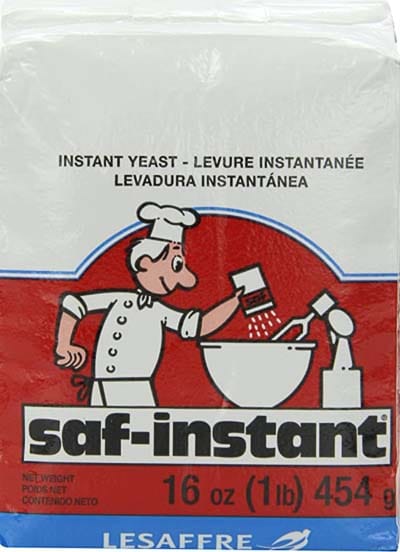
- SAF-INSTANT RED LABEL: another great product and it comes in a bigger, environmentally friendlier packaging of 16oz (450g) that can be stored in your pantry for up to 6 months and frozen for up to a year. If you bake a lot this is a great option. I am considering switching to this one to reduce packaging waste.
Three things yeasts don’t like
- Cold temperatures and air drafts: yeast will go to sleep and will not proof your dough as fast if they are exposed to cold temperatures below 25C or 75F. This is why, no matter what yeast I am using, I like to add lukewarm liquids to the dry ingredients. To help the yeast wake up.
This is also why I like to proof my dough in a closed space, with no air-drafts, and where I can control the temperature. See later chapter on proofing. - Hot temperatures: if you expose yeasts to hot temperatures of above 50C or about 120F they will start to die off, and your dough won’t proof. So never add hot liquids, and never proof you dough in a too-hot environment.
- Salt: yeasts need sugar and water to produce the air necessary for the dough to proof. Salt is a hygroscopic mineral, meaning that it draws water away from its environment. When yeasts and salt are put close to each other, salt steals water from the yeast, and the yeast will die. My tip is to add salt after you’ve already mixed the yeast with the other ingredients.
The kneading
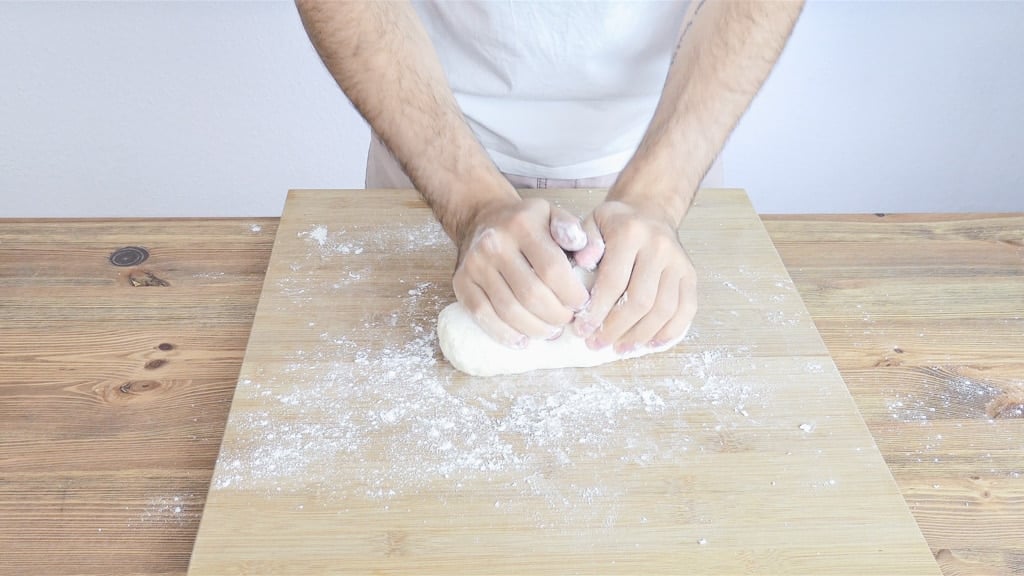
Now that you have picked your yeast, it’s time for kneading, another essential step when making products that need proofing, like these maritozzi alla panna.
You need to knead the dough vigorously for at least 5 minutes. Better if closer to 10. That means that if you do it by hand, you should almost break a sweat and your arms should tingle like if you were doing a light arm workout.
How do you know if the dough has been kneaded enough and is ready to proof?
In Italian baking we say that the dough should be “incordata”. I’ll try to explain.
This means the dough should develop a stringy consistency, like a rope, due to the gluten network that starts developing as you knead.
The gluten network only develops after a few minutes of vigorous kneading and with the right ratio of water to flour.
You’ll notice that when you start kneading, the dough will try to stick to your worktop. This is because the gluten network hasn’t developed yet. At this stage you should NOT add flour.
You should just keep kneading, until the dough becomes one compact, elastic, smooth and stringy mass that does not stick to the worktop anymore.
When this happens, you know that the dough is ready for proofing.
If you do this with a kitchen-aid, then you’ll know that the dough is ready when it does not stick to the sides of the mixing bowl anymore.

Why do I need to develop the gluten network?
Gluten, a healthy protein that has received a lot of bad press due to the trend of gluten free products, is what makes bread, pizza, and other leavened products so delicious.
The gluten network gives elasticity and structure to the dough, so that when the yeasts eat the sugars in the dough and produce air (carbon dioxide), the dough will inflate and grow.
And thanks to the structure given by the gluten network, the air produced by the yeasts will be trapped inside the dough, and the sweet yeasted buns will keep their airy texture even after cooking.
In conclusion, a well developed gluten network is essential to have well-proofed, plumpy, light and airy maritozzi.
Note: if you are allergic to gluten and have been diagnosed with celiac disease then you should stay away from gluten. If you have not been diagnosed with celiac disease or are not gluten-intolerant, then there is absolutely no reason to avoid gluten.
My advice is, however, to only use flours that contain no glyphosate, i.e. that are not sprayed with roundup, a toxic pesticide that has been shown to cause a whole lot of allergies and disease.
Only use organic non-GMO brands that you trust.
Disclaimer: I am not a medical or nutrition expert. These opinions are exclusively mine and are based on my interpretation of publicly available medical studies.
The proofing
Proofing is the last step before baking. Here the yeasts eat the carbohydrates in the dough, and produce carbon dioxide as a byproduct, resulting in the dough to rise. The air produced by the yeast is trapped by the gluten network and forms little air pockets that will produce tasty, light, and airy vegan Italian cream buns.
If you have picked the right yeast, and kneaded your dough correctly, then proofing is just a function of time and temperature.
For a relatively quick and easy proofing, I have three simple tips for you:
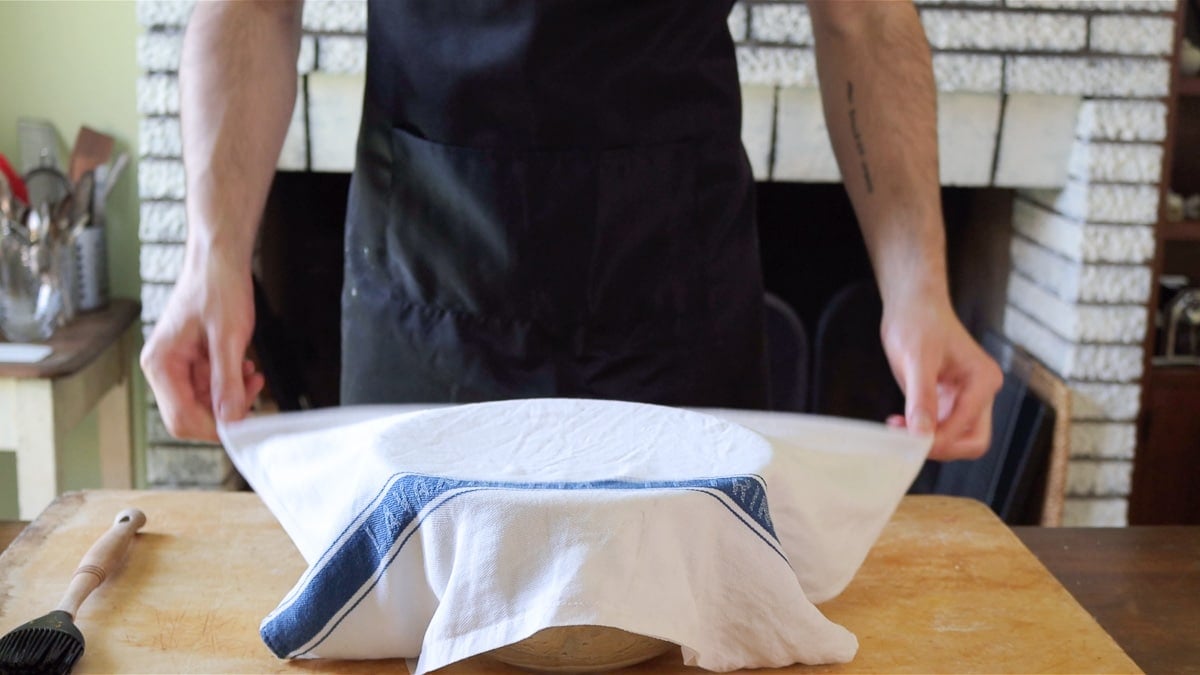
1) Cover the dough with a damp kitchen cloth
I usually soak my kitchen cloth under warm running water, then I squeeze it really hard and use it to cover the bowl with the dough in it, while leaving enough space for the dough to grow.
This method is superior to using plastic wrap because it reduces plastic waste and because it helps the dough to stay moist. I also like to brush the bowl and the dough with a few drops of vegetable oil to prevent the dough from drying.
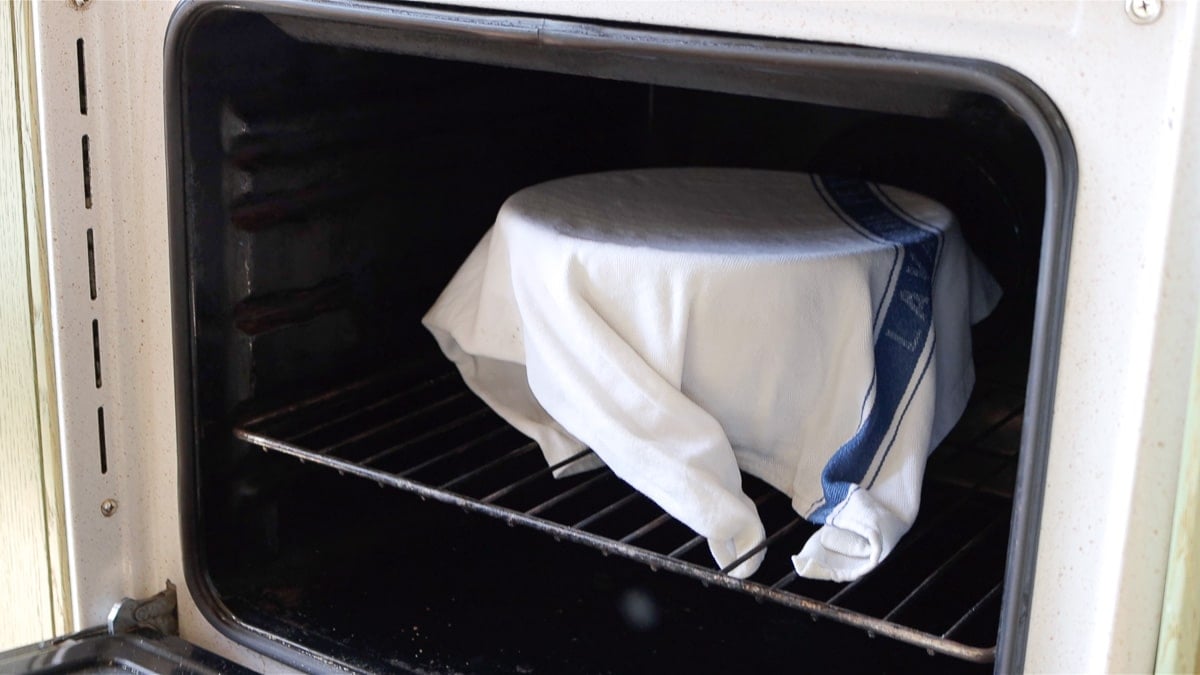
2) Proof in a turned off but slightly warm oven
Turn on your oven for 30 seconds. Then turn it off and put the dough to proof inside. The warm temperature will help the yeasts wake up and the closed oven protects the dough from sudden changes in temperature and air drafts that might slow-down the proofing.
Make sure that the oven is not too hot, or the yeast will die off.
Give the yeast enough time
If you use all-purpose flour give your yeast at least 2 hours of proofing. If you use bread-flour, give them closer to 3 hours. If you use whole-grain flour then at least 3 to 3.5 hours.
If you do a preparation that requires shaping of the dough after proofing like this vegan maritozzi recipe, then I recommend a second proofing after you shaped the dough.
The second proofing should last about 1 hour. Like before, do it in a slightly warm oven, but this time you don’t need to cover the shaped dough with a damp cloth. You can leave it uncovered.
Storage
Store the sweet yeasted buns without filling in a reusable plastic bag in a kitchen cupboard. They’ll stay soft for up to 3 to 4 days.
Store the already filled vegan Italian cream buns in a reusable plastic bag in the refrigerator for up to 3 to 4 days.
If you eat them after a few days and they are slightly dry, do like we do in Italy: dip them in a warm and foamy oat-milk cappuccino!

Vegan Italian Cream Buns – Maritozzi
Equipment
- electric whisk
- Pastry piping bag
Ingredients
- 500 g bread flour or all-purpose
- 100 g sugar
- 7 g instant dry yeast or 7g active dry yeast, or 20g fresh brewer's yeast but in this two cases dissolved in warm water.
- 250 g soy milk
- 70 g sunflower oil
- 50 g raisins
- 2 tsp vanilla extract
- 1 orange zest
- 1 pinch salt
- 400 g vegan whipped cream
Instructions
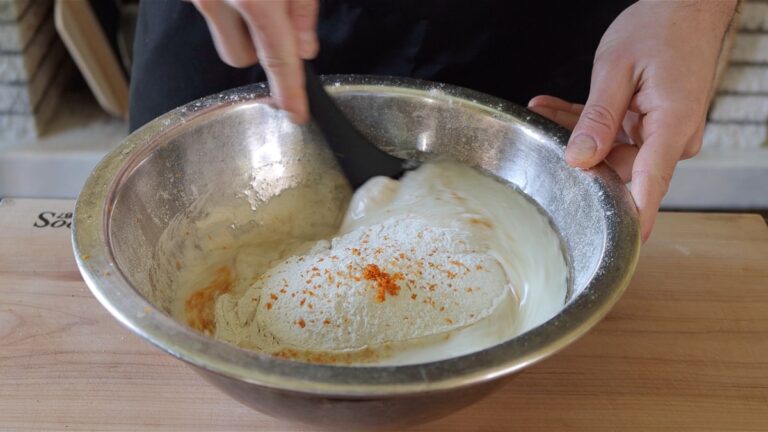
- In a large bowl, add flour, yeast, sugar and mix them together. Add lukewarm soy milk, sunflower oil, salt, vanilla, orange zest, and mix with a spatula.NB: I use instant dry yeast that can be added directly to the flour. If you use fresh yeast or active dry yeast, they need to be dissolved in a lukewarm liquid and sugar before adding them in.

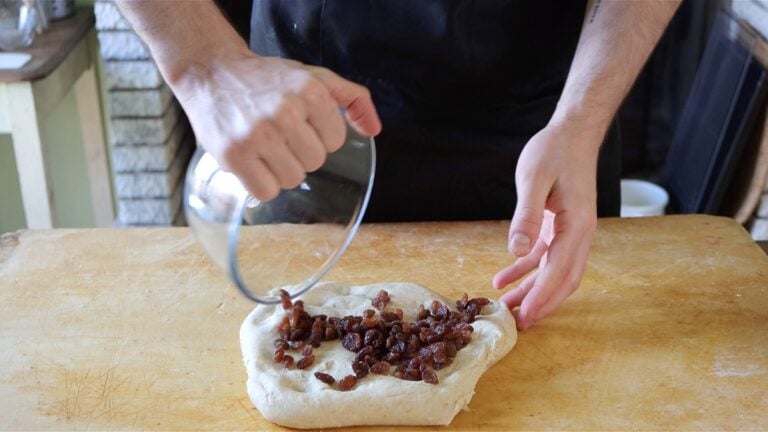
- Transfer onto a worktop and knead with your hands vigorously for at least 5 minutes, or until you get a smooth, soft, and moist dough ball.Now add the raisins to the dough ball and knead with your hands to incorporate the raisins into the dough.
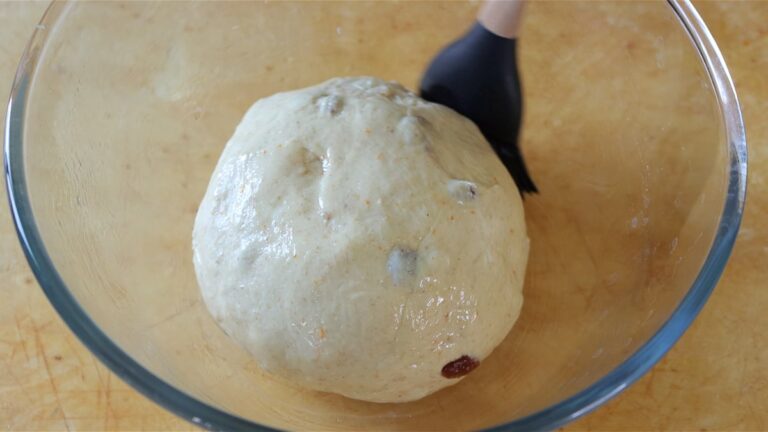
- Brush the inside of a large clean bowl with some oil. Then put in the dough ball, and brush it with a thin layer of oil. Cover the bowl with a damp kitchen cloth. Let proof the dough for 2 to 3 hours in a warm place. It needs to triple in volume.TIP: you can turn your oven on for 30 seconds to make it slightly warm. Then turn it off and let the dough proof in it. If you use all-purpose flour 2 hours should be enough. If you use a semi-whole grain flour, then 3 hours are needed.
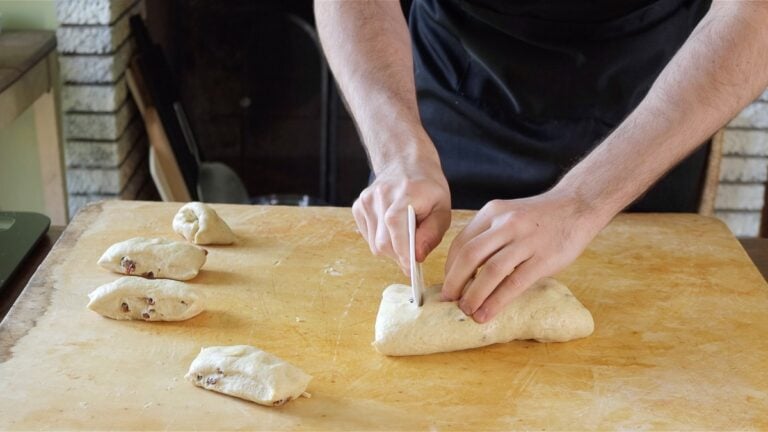
- After proofing, transfer the dough onto a clean worktop. Fold it on itself three times then cut it into small pieces of about 100g / 3.5 oz each.
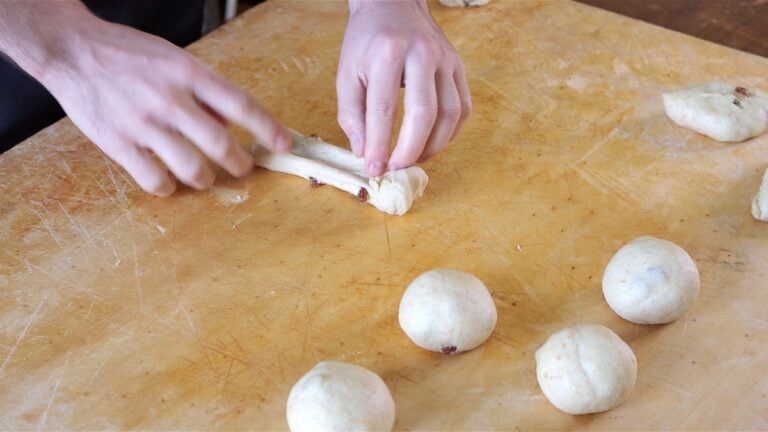
- With the tip of your fingers slightly flatten each piece of dough, then roll it on itself to form a dough ball. With the palm of your hand roll the dough ball on the worktop to make it smooth.
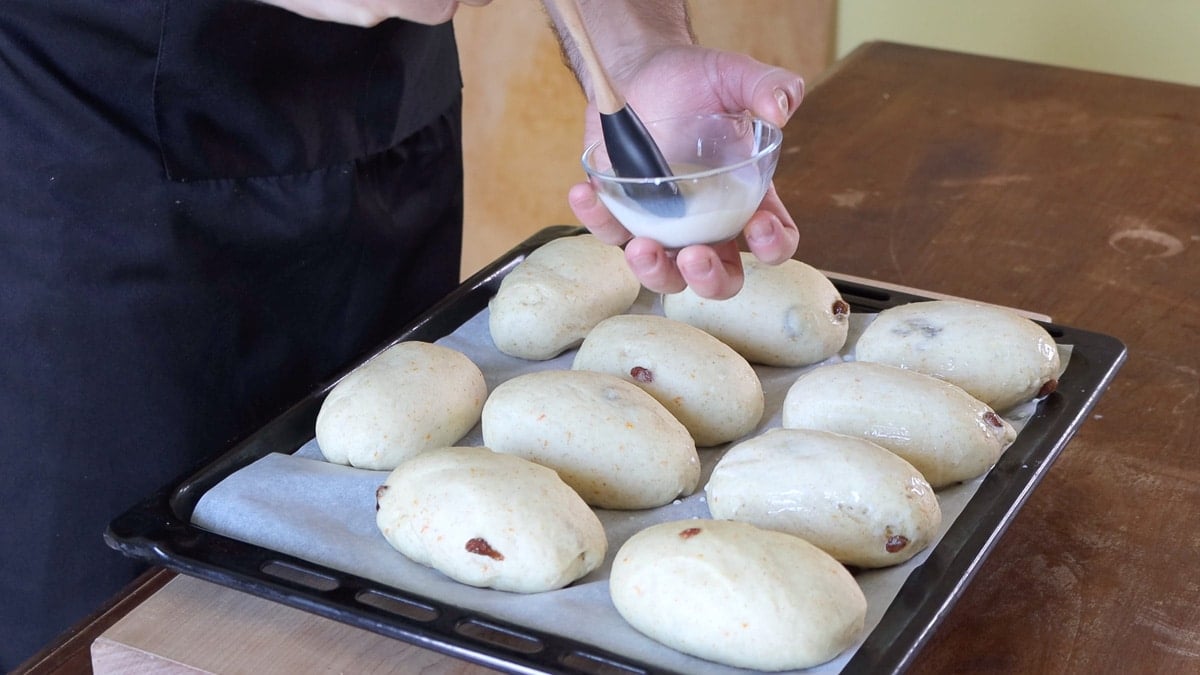
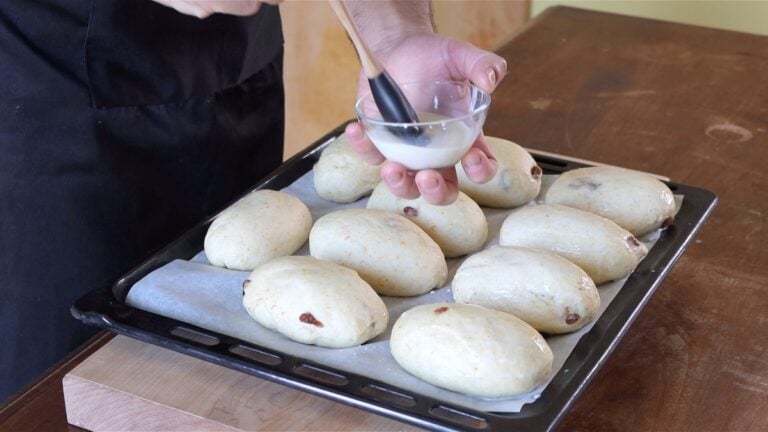
- Take each dough ball and roll it with your hand to form a cylinder shape. Then make the extremities of the cylinder slightly pointy.Place each piece on a baking tray lined with parchment paper and let proof a second time in a warm place for 1 hour.
- Preheat the oven to 180C or 356F. Brush the top of the maritozzi with soy-milk and bake on the lower oven rack for about 14 to 16 minutes. The maritozzi should be golden on top but still very soft. Let cool down completely before eating them or filling them with cream.
- To fill the maritozzi with vegan whipped cream, cut them on the long side and with a pastry piping bag fill them with a generous amount of whipped cream. Sprinkle with some powdered sugar and enjoy!


Thank you for sharing your plant based recipes. They are delicious, healthy and easy to prepare. I love every single recipe that I have prepared following your tutorials. Your recipes came at the perfect time in my life when I am transitioning from being a vegetarian to becoming a vegan person. I am grateful to both of you.
Thank you for your kind support, Elsa!! I’m so delighted we are able to support you in the journey you are on 🙂
We both wish you the best!! 🥰 Kindest, Louise
Delicious! Thank you:)
These are incredible! I didn’t have an orange so I used some lemon zest. Thank you for the recipe!
Hi Ashlie, I’m so happy you liked them, it’s quite a treat to eat! Thanks so much for your comment. Cheers, Nico
What vegan whipped cream recipe do you like for the maritozzi?
Hi Holly, we use a brand called Hoplá, but I am not sure if you can find it where you live. It might only be available in Europe this one.